Features Available With New Magento 2.3

Finally, the latest Magento 2.3.0 is now officially released! It combines with many new tools that improve both merchant, developer experience, as well as enhance its performance.

So, what exactly does this latest platform version have in store?

In a nutshell: Performance, security, and innovation. The features of Magento 2.3.0 have been elevated to a whole new level, building upon their already robust capabilities.

According to the official release notes of Magento 2.3, this update introduces a multitude of functional fixes, supercharges performance, and bolsters security through numerous updates.

Never miss an update from us. Join 10,000+ marketers and leaders.

The enhancements in Magento 2.3.0 are set to transform the way we approach e-commerce, opening up exciting possibilities for merchants and developers alike.

Let’s dive into the key features and benefits that await, and witness the future of online business unfold!

Core Features Based On:

  • Tools to personalize content and add local preferences.
  • Build and manage all channels and experiences via a single code base, one deployment and app.
  • Intuitive user experience with innovative commerce and CMS theme.
  • Module component architecture to help drive opportunities for extension providers.
  • Purpose-built developer tools for fast prototyping, helpful debugging, rich feedback, and increased productivity

(Source: magento.com)

New Magento 2.3

Improved Experience

The new release has features to increase the performance level be delivering the resources faster by lessening the burden on the server.

  • Magento 2.3 now supports the newest version of PHP 7.2. In result, you will get higher security, better performance, and a lot of many new development features at your Magento resource.
  • The all-new encryption and decryption will now be handled by the sodium library in it which will remove the PHP encryption module ‘mcrypt’ and migrate to Libsodium for password hashing.
  • The GraphQL API is now available on Magento 2.3.  This API makes available an alternative to REST and SOAP web APIs for custom frontend development, as well as headless storefronts and PWAs. You can take this advantage in getting more refined data with fewer API requests.
  • Asynchronous Web APIs feature will allow any previous Magento REST APIs to be called asynchronously. This community-contributed element includes separate status APIs that have been formed to check the position of each request. Developers can now use the asynchronous APIs in combination with queues that have also been migrating to Magento App Development.
  • Both Magento commerce, Message Queue are now available in Magento 2.3.0. It’s available as “limited only” before . It allows asynchronous communication between systems. In short, it simplifies the strain on the application band enhances the performance of your Magento store.
  • Another features have been included to the New Release is Declarative Database Schema. It would simplify the installation and upgrading procedure for Magento and the extensions. The Declarative schema reduces the need for many database scripts, eliminating the need to retain these scripts. This feature also supports split and shared database structures and database structure confirmation.

Substantial Security Enhancement

The new release brought over 30 securities fixes to core Magento code including the two-factor authentication features.

Are you looking for a Magento developer

Contact Us

In addition, it also has the Google Authenticator, Duo Security, U2F Devices features now support this service.

Magento 2 Factor AuthenticationImage Source: CloudWays.com

  • The Two Factor Authentication or CAPTCHA protects the Admin panel against stolen passwords and affects stores against bots.

Magento Captcha
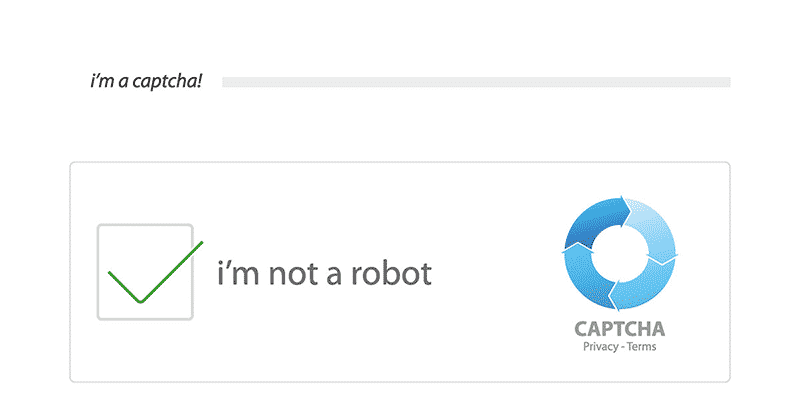
Image Source: Dropified.com

  • The security features also include Cache flush ACL, which grant granular access to cache management settings to avoid accidental modification that may potentially affect system performance. This ACL also lets merchants control which administrative users can clear site caches.

Bundled Extension Enhancement

The Core extension like Amazon Payments, Dotmailer, Klarna Payments, Magento Shipping, Vertex is now supporting on Magento 2.3.0.

Other Helpful Improvements

  • Inventory management/ MSI is available on Magento 2.3.0. This feature would help to control over order and shipment options and will give the full control over the stock store directly from the admin panel.
  • The New Updated version has the PWA Studio feature. It is a set of tools that support the development, deployment, and maintenance of progressive web applications.
  • Through Page Builder features, a merchant can easily customize the look and fill their store by drag and drop visual content editing tool. You can also integrate third party contents such as YouTube, Vimeo videos, and Google Maps.

Conclusion

Unlock the full potential of e-commerce with Andolasoft‘s specialized Magento app development company. Our team of skilled developers possesses in-depth expertise in harnessing the capabilities of Magento to create extraordinary online shopping experiences.

Whether you need tailor-made theme customization, powerful extensions, or seamless third-party integrations, we have you covered.

With our reliable and cost-effective solutions, your business will soar to new heights, captivating customers and driving exceptional growth. Hire our magento developer to transform your e-commerce venture and stay ahead in the dynamic digital landscape.

Utility Open Source Apps In CakePHP That You Need To Know

CakePHP is one of the most popular open source web application framework. It provides an extensible architecture for development, maintenance and deployment of PHP applications. Being based on the MVC Architecture & ORM, it is relatively simple to understand and helps developers to write less code without losing flexibility.

The key features of Open Source Apps written in CakePHP are:

  • Flexible Licensing
  • Works from any Website Directory, with Little Number of Apache Configuration involved
  • Integrated CRUD for Database Interaction
  • Code Generation & Built-in Validation
  • Request Dispatcher with Clean, Custom URLs and Routes
  • Fast and Flexible Templating (PHP Syntax with Helpers)
  • View Helpers for AJAX, JavaScript, HTML Forms and much more
  • Email, Cookie, Security, Session and Request Handling Components
  • Flexible ACL and Data Sanitization
  • Flexible Caching and Localization

CakePHP has the second largest active developer team and community among the PHP frameworks, bringing great value to the project. It keeps you away from reinventing the wheel.

Never miss an update from us. Join 10,000+ marketers and leaders.

Github is the #1 resource for Cakephp projects in my opinion. 2nd place probably is occupied by Code Google and then comes Sourceforge.

Orangescrum

Orangescrum is a flexible project management web application developed using CakePHP framework. It’s an efficient Project Collaboration Tool that gives you full visibility and control over your projects. Orangescrum offers all the basic features you need for smooth running of your project. No matter where you are globally, with Orangescrum you feel like sitting next to your developer. With an intuitive interfaces, easy-to-use functionality, you organize your project activities to a great extent.

Disclaimer: It’s our own project management tool.

https://github.com/Orangescrum/orangescrum

Croogo

Croogo is a free, open source, Multilingual Content management system built using CakePHP MVC framework. It’s an open source project released under MIT License. With Croogo CMS, you can create your own content type such as blog, node, page, etc.  Also you can categorize content with Taxonomy and it also offers WYSIWYG editor to edit content directly from browser.

Zhen CRM

Zhen CRM is a self-hosted CRM with full source code (in CakePHP and MySQL) that aims to be visually easy to use, simple and straightforward, and provides all the features you need from a full-featured CRM!

Vamcart

Vamcart is a CakePHP based open source Shopping cart. It is easy to use and simple to install. It is not required to have any special knowledge to install Vamcart on your server. Just download the files from vamcart homepage and put them on your server’s root directory and open Vamcart installation page directly from the browser. The script will automatically install shopping cart on your site.

QuickApps

QuickApps is a CakePHP based open source Content management system. It is easy to use and simple to install. It allows developers and advanced users to easily build complex websites without reinventing the wheel.


Recommended Blog: Containable Behavior in CakePHP

Definitely, this list is incomplete. Share your favorite open source CakePHP application with us in the comments below.

Creating A Custom Handler Session In CakePHP 2.x

Sessions manage and customization is very easy in CakePHP. Setting and configuration come out of the box so basically you don’t need to configure at all. But still at some point we need customization like, if we need some changes in php.ini or want to store session in a different place.

You can manage session, write custom handler, add option to save on different places, override php.ini settings.

Write Your Own Custom Handler For Sessions in Cake:

To Save Session With Setting in php.ini:

Configure::write('Session', array(
'defaults' => 'php'
));

This is the default setting that comes out of the box by CakePHP.

To Save Session Inside Cake tmp Folder:

Configure::write('Session', array(
'defaults' => 'cake'
));

This is required in a host where it does not allow you to write outside your home directory.

To Save Session in Database:

Configure::write('Session', array(
'defaults' => 'database'
));

This uses a built-in database defaults. It stores session in ‘cake_sessions’ table.
So you need to create a table for this:

CREATE TABLE `cake_sessions` (
`id` varchar(255) NOT NULL DEFAULT '',
`data` text,
`expires` int(11) DEFAULT NULL,
PRIMARY KEY (`id`)
);

But you can specify you own session handler to store session using a different model:

Configure::write('Session', array(
'defaults' => 'database',
'handler' => array(
'model' => 'MyCakeSession'
)
));

Create ‘MyCakeSession’ model at app/Model/MyCakeSession.php  And create ‘my_cake_sessions’ table:

CREATE TABLE `my_cake_sessions` (
`id` varchar(255) NOT NULL DEFAULT '',
`data` text,
`expires` int(11) DEFAULT NULL,
PRIMARY KEY (`id`)
);

This will save session ‘my_cake_sessions’ using MyCakeSession model.

To Save Session in Cake Cache:

Configure::write('Session', array(
'defaults' => 'database'
));

Making Session Persist Across All Sub-Domains:

  • Add below in bootstrap:
    ini_set(‘session.cookie_domain’, env(‘HTTP_BASE’));
  • This changes the default, that only the domain generating a session can access, to all sub-domains.
  • You don’t need to make core Security.level to low or medium.
  • You can also use php, cake, database or cache in core Session default to persist session in all sub-domains.

Troubleshoot:

  • When you test with the session management you might get error: “cakephp 404 The request has been black-holed”.
  • Try clear tmp/cache/, tmp/cache/models, tmp/cache/persistent, tmp/sessions.
  • Try clear browser cookie and cache.
  • Check core Session configurations.

Always try to clear browser cookie, cache before doing changes in core Session or php.ini configuration.

Other Session configuration that can be done are cookie name, timeout, cookieTimeout, checkAgent, autoRegenerate, and other ini values like cookie_secure, cookie_path, cookie_httponly.

See Also : How to migrate CakePHP 1.x to 2.x

Like this blog? I’d love to hear about your thoughts on this. Thanks for sharing your comments.

5 Reasons Why Web Development is Faster With Ruby On Rails

Ruby on Rails aka “RoR” is an open-source MVC framework built using the Ruby programming language.

It is considered as the epitome of the latest generation of high-productivity, open source web development tool. The growing demand for Ruby on Rails has been driven by successful RoR development companies like Andolasoft, who benefit from the speed and agility of building applications in Rails, which results in increased productivity and company growth.

1. Framework Built on Agile Methodology

RoR is faster because the framework was built based on Agile development methodology, best practices are emulated so web development is done with high quality and speed.

RoR framework includes support programs, compilers, code libraries, tool sets, and application programming interfaces (APIs) that bring together the different components to enable development of a project or solution.

Never miss an update from us. Join 10,000+ marketers and leaders.

It’s possible to build sites that used to take 12 weeks in just 6 weeks using Ruby on Rails. It means you can save 50% on your development expenses.

2. Less Code Writing

Rails creates a skeleton for an application or module by executing all the code libraries. You must write some commands to accomplish this. This is what makes the process of web development faster.

Rails makes database deployments simpler than any open, or proprietary solution by allowing for migrations.

  • Adopting principle of DRY

    It also adopts the principle of “Don’t Repeat Yourself”. So all information can be retrieved from a single unambiguous database which tends to easier development.

  • Easy Configuration

    A key principle of Ruby on Rails development is convention over configuration. This means that the programmer does not have to spend a lot of time configuring files in order to get setup, Rails comes with a set of conventions which help speeding up development.

  • Modular Design

    Ruby code is very readable and mostly self-documenting. This increases productivity, as there is little need to write out separate documentation, making it easier for other developers to pick up existing projects.

  • Designer Friendly Templates

    HTML templates is a core feature of Rails. It allow templates to be composed of a base template that defines the overall layout of the page,the base template is called a “layout” while the individual page templates are “views”. The Rails application retrieves the list of tags from the database and makes it available to the view.The section of the view that renders these category is:

    <%= render :partial => 'category' %>

    This refers to a Ruby partial, a fragment of a page, which is contained in _category.html.erb. That file’s content is:

<h3>categories</h3>
<p class="categorylist">
<%= render :partial => 'categorylist', :collection => @category %>
</p>
  • This generates the heading then refers to another partial, which will be used once for each object in the collection named “categorylist”.

3. Third Party Plugin/Gem Support

Mature plugin architecture, well used by the growing community. Rails plugins allows developer to extend or override nearly any part of the Rails framework, and share these modifications with others in an encapsulated and reusable manner.

Rails community provides a wealth of plugins as Ruby Gems that you simply add to your project Gem-file and install. This significantly accelerates development and maintenance time as you’re not trying to integrate disparate libraries, it’s already done for you.

4. Automated Testing

Rails has developed a strong focus on testing, and has good testing suit in-built within the frameworks.

Rails makes it super easy to write your tests. It starts by producing skeleton test code while you are creating your models and controllers.

I’ve worked with the team at Andolasoft on multiple websites. They are professional, responsive, & easy to work with. I’ve had great experiences & would recommend their services to anyone.

Ruthie Miller, Sr. Mktg. Specialist

Salesforce, Houston, Texas

LEARN MORE

Rails ships with a built-in test suite. There are many tools available in the market for testing Rails application as mentioned below with other web apps from many different aspects.

  • Rspec
  • Cucumber
  • Test Unit
  • Shoulda
  • Selenium (not really a ruby thing but more of a web thing)

But if you are new to testing we highly recommend you start with learning Rails own testing suite before start using other tools

5. Easier Maintenance

Once site launches, future modifications to your site (e.g., adding new features, making changes to the data model) can be made more quickly, for the same reasons noted above.
New features can be added quickly and maintaining applications over time can also be more cost-effective.

If you like this one, you might also like Why Rails framework popular among Ruby developers and The Best practices for Rails App Development .

Hash Class: Makes CakePHP Coding easier!

Hash is a predefined class provided by CakePHP. It is used for array manipulation such as inserting an element to an array, remove an element from an array, sort an array, extract part of a large array, filter the non empty elements, rearrange the whole array, which makes the code more optimized and understandable. So it makes CakePHP easier and flexible to use. Because most of the operations like find, insert, update in CakePHP returns/takes array as output/input.

Hash provides an improved interface, more consistent and predictable set of features over Set. While it lacks the spotty support for pseudo XPath, its more fully featured dot notation provides similar features in a more consistent implementation.

Operations performed by Hash class:

  • extract()
  • combine()
  • filter()
  • check()
  • insert()
  • remove()
  • sort()
  • and many more…

Some Important Tips:

{n} – Match any numeric key.
{s} – Match any string value and numeric string values.
[id] – Matches elements with a given array key.
[id=2] – Matches elements with id equal to 2.
[id!=2] – Matches elements with id not equal to 2.
[id<=2] – Matches elements with id less than or equal to 2.

– Matches elements that have values matching the regular expression inside.

  • Hash::extract(array $data, $path):

Retrieve required data from array. You do not have to loop through the array.

Ex: // Common Usage:

$users = $this->User->find("all");
 $results = Hash::extract($user, '{n}.User.id');
 // $results equals:
 // array(1,2,3,4,5,...);
  • Hash::insert(array $data, $path, $values = null):

Insert sub-array’s into the original array.

Ex:

$temp = array(
 'page' => array('name' => 'page')
);
$result = Hash::insert($temp, 'file', array('name' => 'files'));
// $result now looks like:
Array
(
 [page] => Array
 (
 [name] => page
 )
 [file] => Array
 (
 [name] => files
 )
)
  • Hash::remove(array $data,  $path = null):
Remove data from any path specified.

EX:

$arr_test = array(
 'page' => array('name' => 'page'),
 'file' => array('name' => 'files')
);
$result = Hash::remove($arr_test, 'file');
/* $result now looks like:
 Array
 (
 [page] => Array
 (
 [name] => page
 )
 
)
*/
  • Hash::combine(array $data$keyPath = null$valuePath = null$groupPath = null)

Combine the results to form a new array of expected result. Helpful in case, where we are displaying data in the form of select box. Like categories, states, city etc. We don’t have to retrieve the data separately. We can find the required data from the original result set retrieved, containing the information..

Ex:

$arr_test = array(
 array(
 'User' => array(
 'id' => 2,
 'group_id' => 1,
 'Data' => array(
 'user' => 'John.doe',
 'name' => 'Matt Lee'
 )
 )
 ),
 array(
 'User' => array(
 'id' => 14,
 'group_id' => 2,
 'Data' => array(
 'user' => 'phpunt',
 'name' => 'Jack'
 )
 )
 ),
);
 
$result = Hash::combine($arr_test, '{n}.User.id', '{n}.User.Data');
/* $result now looks like below:
 Array
 (
 [2] => Array
 (
 [user] => John.doe
 [name] => Matt Lee
 )
 [14] => Array
 (
 [user] => phpunt
 [name] => Jack
 )
 )
*/
  • Hash::check(array $datastring $path = null)
    Check whether an element exists in the array or not.

Ex:

$set = array(
 'My Index' => array('First' => 'The first item1')
);
$result = Hash::check($set, 'My Index.First');
// $result == True
  • Hash::filter(array $data$callback = array(‘Hash ‘‘Filter’)):
Keep only non-empty elements and filter the empty elements.
Ex:
$data_arr = array(
 '0',
 false,
 true,
 0,
 array('test', 'is you own', false)
);
$result = Hash::filter($data_arr);
 
/* Out put:
 Array (
 [0] => 0
 [2] => true
 [3] => 0
 [4] => Array
 (
 [0] => one thing
 [2] => is you own
 )
 )
*/
  • Hash::sort(array $data$path$dir$type = ‘regular’)

Sort an array according to the path, direction and type provided.

Ex:

$arr_test = array(
 0 => array('Person' => array('name' => 'Jeff1')),
 1 => array('Shirt' => array('color' => 'black1'))
);
$result = Hash::sort($arr_test, '{n}.Person.name', 'asc');
/* $result now looks like:
 Array
 (
 [0] => Array
 (
 [Shirt] => Array
 (
 [color] => black1
 )
 )
 [1] => Array
 (
 [Person] => Array
 (
 [name] => Jeff1
 )
 )
 )
*/

$type can be of the following type:

regular
numeric
string
natural(ex. Will sort fooo10 below fooo2 as an example)

$dirc can be of two type asc & desc

For more information refer: http://book.cakephp.org/2.0/en/core-utility-libraries/hash.html

However if you want you can hire or get free consultation from our experienced CakePHP developers.

Read More: Password Hashing API in PHP

Have I missed out anything? Comment at end of this topic.

How To Make Static Framework IOS Device Independent?

In our previous post, we had mentioned the steps to create a Static Library or Framework for iOS. Here, we will illustrate the steps to make it device independent, i.e. the library can be used to develop app for all iOS devices, instead of recreating the code for each device.

Step 1: Create an Aggregate Target

  • Click File >> New Target and create a new Aggregate target in Other menu.

  • Name your aggregate target – like ‘Framework’

xcode_image

 Step 2: Adding the Static Library as a Dependent Target

  • Add the static library target to the ‘Target Dependencies’.

framework-image

Step 3: Build the ‘Other’ Platform

  • To build the ‘Other’ platform, use a ‘Run Script’ phase.

  • Add a new ‘Run Script’ build phase to your ‘Aggregate’ target and paste the following code.
set -e
 
set -e
 
set +u
 
# Avoid recursively calling this script.
 
if [[ $SF_MASTER_SCRIPT_RUNNING ]]
 
then
 
   exit 0
 
fi
 
set -u
 
export SF_MASTER_SCRIPT_RUNNING=1


SF_TARGET_NAME=${PROJECT_NAME}
 
SF_EXECUTABLE_PATH="lib${SF_TARGET_NAME}.a"
 
SF_WRAPPER_NAME="${SF_TARGET_NAME}.framework"


# The following conditionals come from
 
# https://github.com/kstenerud/iOS-Universal-Framework


if [[ "$SDK_NAME" =~ ([A-Za-z]+) ]]
 
then
 
   SF_SDK_PLATFORM=${BASH_REMATCH[1]}
 
else
 
   echo "Could not find platform name from SDK_NAME: $SDK_NAME"
 
   exit 1
 
fi


if [[ "$SDK_NAME" =~ ([0-9]+.*$) ]] then
 
   SF_SDK_VERSION=${BASH_REMATCH[1]}
 
else
 
   echo "Could not find sdk version from SDK_NAME: $SDK_NAME"
 
   exit 1
 
fi


if [[ "$SF_SDK_PLATFORM" = "iphoneos" ]]
 
then
 
   SF_OTHER_PLATFORM=iphonesimulator
 
else
 
   SF_OTHER_PLATFORM=iphoneos
 
fi


if [[ "$BUILT_PRODUCTS_DIR" =~ (.*)$SF_SDK_PLATFORM$ ]]
 
then
 
   SF_OTHER_BUILT_PRODUCTS_DIR="${BASH_REMATCH[1]}${SF_OTHER_PLATFORM}"
 
else
 
   echo "Could not find platform name from build products directory: $BUILT_PRODUCTS_DIR"
 
   exit 1
 
fi


# Build the other platform.
 
xcodebuild -project "${PROJECT_FILE_PATH}" -target "${TARGET_NAME}" -configuration "${CONFIGURATION}" -sdk ${SF_OTHER_PLATFORM}${SF_SDK_VERSION} BUILD_DIR="${BUILD_DIR}" OBJROOT="${OBJROOT}" BUILD_ROOT="${BUILD_ROOT}" SYMROOT="${SYMROOT}" $ACTION


# Smash the two static libraries into one fat binary and store it in the .framework
 
lipo -create "${BUILT_PRODUCTS_DIR}/${SF_EXECUTABLE_PATH}" "${SF_OTHER_BUILT_PRODUCTS_DIR}/${SF_EXECUTABLE_PATH}" -output "${BUILT_PRODUCTS_DIR}/${SF_WRAPPER_NAME}/Versions/A/${SF_TARGET_NAME}"


# Copy the binary to the other architecture folder to have a complete framework in both.
 
cp -a "${BUILT_PRODUCTS_DIR}/${SF_WRAPPER_NAME}/Versions/A/${SF_TARGET

Step 4: Build to verify

  • Now  you have set up an environment to build a distributable <project_name>.framework

  • Build the ‘Aggregate’ target

  • Expand the Products group in X-Code, right click the static library and click ‘Show in Finder’

Note: If this doesn’t open Finder to show the static library, then try opening

~/Library/Developer/Xcode/DerivedData/<project name>/Build/Products/Debug-iphonesimulator/.

  • In this folder you will find your <project_name>.framework folder.

You can now share the <project_name>.framework among other iOS app developers.