Superset Plugin Compatibility: What Breaks Between 3.x and 4.x and How to Migrate a Plugin

A custom chart plugin is compiled into the Superset frontend bundle. That is what makes it fast and first-class, and it is also why an upgrade can break it: the plugin is built against one version of @superset-ui/core and @superset-ui/chart-controls, and after the upgrade it runs against another. Minor releases rarely matter. Major ones, and the 3.x to 4.x jump in particular, changed enough that most plugins need at least a rebuild and some need real changes.This post is the checklist we work through when we carry a plugin across that line. It assumes you have a plugin structured the way the build guide describes: index.ts, buildQuery.ts, controlPanel.ts, transformProps.ts and a React component, registered in MainPreset.js.

One caveat up front. The exact list of breaking changes depends on the two versions you are moving between. The authoritative source is UPDATING.md in the Superset repository, read for every release between your current tag and your target. What follows is the set that has affected plugins we maintain.

Why plugins break at all

Three kinds of coupling exist between a plugin and the Superset it runs in:

  • Package coupling. The plugin imports from @superset-ui/core, @superset-ui/chart-controls and often @superset-ui/plugin-chart-echarts. These packages live inside the Superset monorepo and are versioned with it. A type that was exported in one version may be renamed or removed in the next.
  • Behavioural coupling. The plugin relies on how Superset builds queries, passes form data, applies filters and handles cross-filter events. Feature flags that flip their default between versions change this behaviour without changing any API.
  • Toolchain coupling. The plugin is compiled by Superset’s webpack, TypeScript and Babel configuration, on the Node version the Superset frontend requires. A stricter TypeScript setting or a newer Node can fail a build that has not changed.

Most upgrade pain comes from the second and third, because they do not show up as type errors.

What changed between 3.x and 4.x that plugin authors notice

Node and build tooling

The 4.x frontend requires Node 18. If your plugin’s CI still runs Node 16, the first symptom is a build failure with no obvious connection to your code. Align the Node version in your plugin repository, your Dockerfile and your CI with superset-frontend/package.json at the target tag.

TypeScript configuration also tightened across the 3.x line. Code that compiled with implicit any or loose null checks can start failing. Fix the types rather than loosening the config; the Superset build uses its own settings, not yours.

Peer dependency pins

Every plugin declares @superset-ui/core and @superset-ui/chart-controls as peer dependencies pinned to specific versions. Those versions moved through the 3.x and 4.x releases. A mismatch produces one of two failures:

  • The package manager resolves two copies of @superset-ui/core into the bundle. Registries and theme contexts are singletons, so the plugin’s copy cannot see the charts, colour schemes or theme registered by Superset’s copy. The symptom is an error along the lines of “theme is undefined” or a chart that never appears in the picker.
  • A type or helper the plugin imports no longer exists at the new version, which is a compile error and at least easy to find.

Update the pins to match the target Superset before doing anything else.

Time range and axis controls

The GENERIC_CHART_AXES feature flag, which lets any column be the x-axis and moves the time range into ad-hoc filters, became the default behaviour in the 3.x line and is the only behaviour in 4.x. Plugins built for 2.x or early 3.x often still use the legacy time section:

typescript
controlPanelSections: [
  sections.legacyRegularTime,
  // ...
]

This still compiles, and for regular (non-time-series) charts it still works. For time-series plugins it produces a control panel that does not match the rest of the product: users expect a time column and a time grain as controls, and the time range as a filter. Move to the generic axis pattern used by the ECharts time-series plugins: an x_axis control, a time_grain_sqla control, and no legacy time section. Your buildQuery then reads formData.x_axis and includes it in columns rather than assuming a __timestamp column.

Filter box removal

Superset 4.0 removed the legacy filter box chart. Plugins are rarely affected directly, but dashboards that used filter boxes to drive your chart now drive it through native filters, which arrive in extra_form_data on the query object. If your buildQuery manipulated extras or filters by hand, check that native filter values still reach the query. The buildQueryContext helper handles this correctly; hand-rolled query construction sometimes does not.

Cross-filter behaviours

Cross-filtering matured across 3.x and is on by default in 4.x. A plugin that declares Behavior.InteractiveChart is expected to emit and respond to cross-filters properly. Two things to check:

  • Emitting. The plugin should call setDataMask with both extraFormData.filters and filterState.value when the user selects an element, and clear both on deselect. Plugins that set only one of these leave the dashboard in an inconsistent state.
  • Receiving. When another chart filters this one, the filter arrives through the normal query path. Verify the chart re-queries rather than showing stale data.

If the plugin cannot participate in cross-filtering, remove Behavior.InteractiveChart from its metadata so the dashboard does not offer the option.

Theme tokens and styling

Superset’s theme object gained and reorganised tokens through 3.x. Plugins that reach into theme.colors.* or theme.gridUnit should be checked against the theme type exported by the target @superset-ui/core. Hard-coded colours keep working but look wrong in a customised deployment, which is the moment stakeholders notice.

Note for readers on the 5.x line: Superset 5 replaced the theme system with Ant Design 5 design tokens and a JSON theme format. That is a larger change than anything in 3.x to 4.x and deserves its own migration pass.

Content Security Policy

4.0 turned on Flask-Talisman and its Content Security Policy by default. Plugins that load scripts, fonts or images from external domains, for example a map tile server or a CDN-hosted library, are blocked unless TALISMAN_CONFIG allows those origins. This is a deployment change rather than a plugin change, but the plugin author is usually the one who has to explain the blank map.

Legacy visualisation migrations

4.0 completed the migration of several legacy charts to their ECharts replacements and removed the old implementations. This matters to plugin authors in one specific case: if your plugin extended or copied code from a legacy chart, the shared code it borrowed may be gone. Search your plugin for imports from legacy-plugin-chart-* packages.

Got more than one custom plugin to check?

Auditing every plugin against this list scales badly past two or three. A Plugin Scoping Call gets you a migration estimate across your whole plugin set, not just one at a time.

Book a Plugin Scoping Call

How to find out which of these affect you

Do this before touching any code.

  • Read `UPDATING.md` from your current tag to the target tag. Note every entry that mentions the frontend, feature flags, @superset-ui, or chart behaviour.
  • Diff the feature flag defaults between the two versions in superset/config.py. Any flag that flipped and touches charts or dashboards is a behavioural change your plugin will see.
  • Check the two package versions of @superset-ui/core and @superset-ui/chart-controls in superset-frontend/package.json at both tags, and read the changelogs for those packages.
  • Grep your plugin for the things listed above: legacyRegularTime, __timestamp, setDataMask, theme.colors, hard-coded colours, external URLs, and any import from a legacy- package.

You now have a list. Usually it is short.

Migration sequence

Work in this order; each step gives you a stable checkpoint.

  • Branch the plugin and name the branch for the target Superset version.
  • Bump the peer dependencies and dev dependencies to the target versions. Set Node to the target version.
  • Build the plugin alone (npm run build). Fix compile and type errors. This clears the package coupling.
  • Link it into a Superset checkout at the target tag and run the dev server. Open the chart in Explore. This surfaces registry and theme problems immediately.
  • Work through the behavioural list: time controls, filters, cross-filters, CSP. Test each in a dashboard, not only in Explore, because filters and cross-filters only exist on dashboards.
  • Restore or re-record thumbnails if the chart’s appearance changed.
  • Run the tests and update fixtures for any changed ChartProps shape.
  • Build the production image from the target tag with the plugin included, deploy to staging, and load every saved chart that uses the plugin. A saved chart carries the form data it was created with; charts saved under the old control panel are where migration bugs hide.

Budget half a day for a minor version and one to two days for a major one, assuming a single plugin of moderate complexity. Multiply for plugins that render maps or use WebGL.

Tests that make the next upgrade cheaper

  • Golden `ChartProps` fixtures. Save a real chartProps object from the running product for each chart configuration you support and assert transformProps output against it. When the shape changes, the diff tells you exactly what moved.
  • Saved-chart smoke test. A script that lists every saved chart with your viz_type and loads each one’s data endpoint. Run it against staging after every upgrade.
  • Control panel snapshot. A test that renders the control panel config and snapshots the control names. A rename in sharedControls shows up here instead of in production.

Keeping the fork thin

The lines you maintain inside the Superset repository should be two: the dependency in superset-frontend/package.json and the registration in MainPreset.js. Every upgrade is a rebase of those two lines onto the new tag. If your fork has grown beyond that, the upgrade cost is no longer about the plugin, and it is worth moving the extra code into the plugin package or a separate extension before the next major version.

Frequently Asked Questions

Will my Superset 3.x plugin work on 4.x without any changes?

Sometimes, but do not plan for it. A plugin that only uses stable @superset-ui/core exports and no time-range controls often survives untouched. Anything that uses the legacy time section, the filter box, hard-coded colours or the older cross-filter callbacks will need work. The only reliable answer comes from building the plugin against the target version and reading the errors.

What is the most common cause of a plugin breaking after a Superset upgrade?

Two copies of @superset-ui/core in the same bundle. Registries and theme contexts are singletons, so when the plugin’s copy differs from Superset’s copy, the plugin cannot see the charts, colour schemes or theme that Superset registered. It usually surfaces as “theme is undefined” or a chart that never appears in the picker. Align the peer dependency pins before investigating anything else.

The filter box was removed in 4.x. Do I have to rewrite my plugin?

Only if your plugin depended on it. The filter box was a chart type, not a plugin API, so most custom charts are unaffected. What does change is the surrounding dashboard: filters now come from native dashboard filters and cross-filters, so a plugin that read filter state the old way needs updating to the current hooks.

How long does a 3.x to 4.x plugin migration usually take?

For a single plugin with current dependency pins and no legacy time controls, a day is realistic, most of it spent on the build tooling and the test pass. Plugins that span more than one major version, borrow from legacy chart code, or have no tests take substantially longer, and the estimate is worth getting before the upgrade is scheduled rather than after.

Build It With Andolasoft

If the plugin was written by someone who has left, if it borrows from legacy chart code, or if the upgrade spans more than one major version, the cheapest first step is a scoping conversation rather than a spike. Our Plugin Scoping Call is free and 45 minutes; you leave with a written estimate of the migration effort. The wider service is described on the Superset plugin development page, and if the upgrade itself is the worry, the Architecture Review covers upgrade readiness for the whole deployment.

If a Superset upgrade is already on the calendar and the custom charts are the unknown, book a Plugin Scoping Call. We will review the plugins you have, tell you which of the changes above apply to each, and give you a written migration estimate before you commit to an upgrade date.

How to Set Up Okta Single Sign-On for Apache Superset

Password logins are the first thing an auditor asks about and the last thing anyone wants to manage by hand. If your team already uses Okta for everything else, Superset should not be the exception: one identity, one place to offboard, and roles that follow the person rather than the login.

Apache Superset supports this out of the box through Flask-AppBuilder (FAB), the framework Superset is built on. The pieces are all there. What is missing is a single, current walkthrough that covers the Okta side, the Superset side, the role mapping, and the handful of reverse-proxy and cookie settings that turn a working configuration into a redirect loop. This is that walkthrough.

By the end, you will have:

  • Okta as the only login path for Superset, with the local password form gone.
  • Users created automatically on first login, with their Okta groups mapped to Superset roles.
  • Role changes in Okta reflected in Superset at next login.
  • A troubleshooting table for the errors this setup produces in practice.

The configuration shown here applies to Superset 2.1 through 4.x. The examples were written against Superset 4.x with the Flask-AppBuilder 4 series it ships with.

How Superset authentication actually works

Superset does not implement authentication itself. FAB does, through its SecurityManager, and Superset extends that with SupersetSecurityManager. FAB supports five authentication types, selected with AUTH_TYPE in superset_config.py:

AUTH_TYPE What it does Typical use
AUTH_DB Username and password stored in Superset’s metadata database Default, small teams, demos
AUTH_LDAP Bind against an LDAP or Active Directory server On-premises corporate directories
AUTH_OAUTH OAuth 2.0 / OpenID Connect against one or more providers Okta, Azure AD, Google, Keycloak, Auth0
AUTH_OID Legacy OpenID 2.0 Rarely used today
AUTH_REMOTE_USER Trust a header set by an upstream proxy Behind an SSO-terminating gateway

Okta is an AUTH_OAUTH provider. Under the hood, FAB uses the Authlib client library to run the authorization-code flow, fetch the user’s profile from the provider’s userinfo endpoint, and hand the result to a method called oauth_user_info. FAB ships a handler for Okta, so a standard setup works without a custom security manager — though as Step 2 explains, there is one good reason to write one anyway.

Prerequisites

  • Admin access to your Okta org, or someone who has it and twenty minutes.
  • A running Superset instance reachable over HTTPS on a stable hostname. OAuth callbacks to localhost work for testing; callbacks to plain HTTP in production do not.
  • The ability to edit superset_config.py and restart Superset.
  • Authlib installed in the Superset environment. The official Docker image includes it. For a pip install, run pip install authlib if python -c "import authlib" fails.
  • A short list of Okta groups you want to map to Superset roles. Three is a good start: administrators, analysts who can write SQL, and viewers.

Step 1: Create the Okta application integration

In the Okta Admin Console:

  1. Go to Applications, then Applications, and click Create App Integration.
  2. Choose OIDC – OpenID Connect as the sign-in method and Web Application as the application type.
  3. Name it something your users will recognise, for example “Superset BI”.
  4. Under Grant type, leave Authorization Code ticked. Superset does not need implicit or hybrid flows.
  5. Set the Sign-in redirect URI to https://superset.example.com/oauth-authorized/okta. The last path segment must match the provider name you will use in superset_config.py, which in this guide is okta.
  6. Set the Sign-out redirect URI to https://superset.example.com/login/.
  7. Under Assignments, assign the groups that should be allowed to log in. Anyone not assigned will be refused by Okta before Superset ever sees them, which is the behaviour you want.
  8. Save, then copy the Client ID and Client secret from the General tab.

Choose the authorization server and expose groups

Okta has two kinds of authorization servers. The org authorization server at https://<your-org>.okta.com issues tokens for Okta’s own APIs and does not let you add custom claims. The default custom authorization server at https://<your-org>.okta.com/oauth2/default does, and it is what you need if you want group-based role mapping. Every URL in this guide uses the custom server.

To make Okta include the user’s groups in the response Superset reads:

  1. Go to Security, then API, open the default authorization server, and select the Claims tab.
  2. Click Add Claim. Name it groups, set the value type to Groups, filter Matches regex with the value .*, and include it in Any scope.
  3. Add the claim for both the ID Token and the Access Token, with type Always. FAB does not read the ID token; it calls Okta’s userinfo endpoint with the access token and maps roles from that payload. Configuring only the ID token is the most common reason group mapping silently does nothing.
  4. On the Scopes tab, confirm a groups scope exists, or add one. Superset will request it.

The regex .* returns every group the user belongs to. In large orgs, that can be a long list. Filter by a prefix such as ^superset_ if you want to keep the token small; everything else in this guide still works.

Step 2: Configure Superset

Add the following to superset_config.py. Keep the client secret out of the file and read it from the environment or your secrets manager.

python
import os
from flask_appbuilder.security.manager import AUTH_OAUTH

OKTA_BASE_URL = os.environ["OKTA_BASE_URL"]  # e.g. https://acme.okta.com
OKTA_ISSUER = f"{OKTA_BASE_URL}/oauth2/default"

AUTH_TYPE = AUTH_OAUTH

OAUTH_PROVIDERS = [
    {
        "name": "okta",
        "icon": "fa-circle-o",
        "token_key": "access_token",
        "remote_app": {
            "client_id": os.environ["OKTA_CLIENT_ID"],
            "client_secret": os.environ["OKTA_CLIENT_SECRET"],
            "api_base_url": f"{OKTA_ISSUER}/v1/",
            "client_kwargs": {"scope": "openid profile email groups"},
            "server_metadata_url": f"{OKTA_ISSUER}/.well-known/openid-configuration",
            "access_token_url": f"{OKTA_ISSUER}/v1/token",
            "authorize_url": f"{OKTA_ISSUER}/v1/authorize",
            "jwks_uri": f"{OKTA_ISSUER}/v1/keys",
        },
    }
]

# Create a Superset user the first time someone signs in through Okta.
AUTH_USER_REGISTRATION = True

# Role for users whose groups match nothing in AUTH_ROLES_MAPPING.
AUTH_USER_REGISTRATION_ROLE = "Gamma"

# Okta group name -> list of Superset roles.
AUTH_ROLES_MAPPING = {
    "superset_admins": ["Admin"],
    "superset_analysts": ["Alpha", "sql_lab"],
    "superset_viewers": ["Gamma"],
}

# Re-evaluate roles from the groups claim on every login, so a change in
# Okta takes effect the next time the user signs in.
AUTH_ROLES_SYNC_AT_LOGIN = True

What each block does:

  • name is the provider key. It appears in the login button and, more importantly, in the callback path /oauth-authorized/okta. It must match the redirect URI you registered in Okta.
  • server_metadata_url lets Authlib discover the token endpoint, signing keys and supported scopes from Okta’s OpenID configuration document. The explicit access_token_url, authorize_url and jwks_uri entries are belt and braces; they let the flow keep working if discovery is ever blocked by an egress firewall.
  • api_base_url is where FAB fetches the user profile from. FAB’s built-in Okta handler calls userinfo relative to this URL, which resolves to https://acme.okta.com/oauth2/default/v1/userinfo.
  • client_kwargs.scope must include groups, or the claim you created in Step 1 will never arrive.
  • AUTH_USER_REGISTRATION is what turns a successful Okta login into a Superset user record. Without it, only users you created by hand can log in.
  • AUTH_ROLES_MAPPING keys are Okta group names, exactly as they appear in the token. Values are lists of Superset role names. Admin, Alpha, Gamma, sql_lab and Public are the roles Superset creates by default; any custom role you have created works too.
  • AUTH_ROLES_SYNC_AT_LOGIN is the setting most people miss. Without it, roles are assigned once, at registration, and removing someone from an Okta group has no effect on what they can see in Superset. Note the flip side: with sync on, Okta is the only source of truth, so a role you grant by hand in Superset’s UI is wiped at that user’s next login.

When you need a custom security manager

FAB’s built-in Okta handler works, but it derives the username from the token’s sub claim and prefixes it, so your user list fills up with entries like okta_00u1a2b3c4d5e6f7g8h9. That is unpleasant to administer and impossible to eyeball against an audit request. Overriding oauth_user_info is also the fix if your Okta org names the groups claim differently, nests it, or you want usernames to be email addresses regardless of what preferred_username says:

python
import logging

from superset.security import SupersetSecurityManager

log = logging.getLogger(__name__)


class OktaSecurityManager(SupersetSecurityManager):
    def oauth_user_info(self, provider, response=None):
        if provider != "okta":
            return super().oauth_user_info(provider, response)

        me = self.appbuilder.sm.oauth_remotes[provider].get("userinfo").json()

        # Logs which claims arrived without dumping personal data.
        log.debug("Okta userinfo claims: %s", sorted(me.keys()))

        return {
            "username": me["email"].lower(),
            "first_name": me.get("given_name", ""),
            "last_name": me.get("family_name", ""),
            "email": me["email"].lower(),
            "role_keys": me.get("superset_roles", me.get("groups", [])),
        }


# Also in superset_config.py, after the class is importable:
CUSTOM_SECURITY_MANAGER = OktaSecurityManager

The role_keys list is what FAB matches against AUTH_ROLES_MAPPING. Using the email address as the username is a deliberate choice: it is stable, unique, and survives a rename in Okta better than preferred_username does. Pick one convention before the first login, because changing it later creates duplicate user records.

That debug line is also your diagnostic for Step 1: if groups is missing from the logged claim list, the problem is the Okta claim configuration, not Superset.

Working behind a reverse proxy changes this next part

Proxy headers, session cookies, and role mapping are where Okta setups usually break in production, not in the OAuth handshake. A Superset Architecture Review checks the deployment, not just the login flow.

Book a Superset Architecture Review

Step 3: Settings that matter behind a reverse proxy

Almost every production Superset sits behind a load balancer, an ingress controller, or an Nginx proxy that terminates TLS. That changes what Superset thinks its own URL is, and OAuth is unforgiving about URLs.

python
from datetime import timedelta

# Trust X-Forwarded-* headers from the proxy so Superset builds https:// URLs.
ENABLE_PROXY_FIX = True
PROXY_FIX_CONFIG = {"x_for": 1, "x_proto": 1, "x_host": 1, "x_port": 1, "x_prefix": 1}

# Cookies must be sent on the callback from Okta.
SESSION_COOKIE_SECURE = True
SESSION_COOKIE_HTTPONLY = True
SESSION_COOKIE_SAMESITE = "Lax"  # "Strict" breaks the OAuth callback

# Log people out after a working day; Okta deactivation does not end live sessions.
PERMANENT_SESSION_LIFETIME = timedelta(hours=10)

Three points worth underlining:

  • Without ENABLE_PROXY_FIX, Superset sees the request as plain HTTP and constructs a redirect_uri starting with http://. Okta compares it to the https:// value you registered and rejects the login with a redirect URI mismatch.
  • SESSION_COOKIE_SAMESITE = "Strict" looks like the secure choice, and it is the one that breaks OAuth. The callback from Okta is a cross-site navigation. With Strict, the browser withholds the session cookie, Superset cannot find the state it stored before redirecting, and you get a mismatching_state error. Use Lax.
  • Deactivating someone in Okta stops new logins immediately but does not touch sessions Superset has already issued. PERMANENT_SESSION_LIFETIME bounds how long that window can be. For sensitive data, make it shorter.

Step 4: Restart and test

Restart Superset. The login page now shows a single “Sign in with Okta” button and no username or password fields.

  1. Sign in with a user who is in superset_admins. You should land on the welcome page with the Admin menu visible.
  2. Go to Settings, then List Users, and confirm the user was created with the expected username, email, and roles.
  3. Sign in as a user in superset_viewers from a private window. Confirm they see dashboards they are permitted to see and nothing else. Row-level security rules, if you have them, still apply exactly as before; SSO changes how people authenticate, not what the roles allow.
  4. Move that user into superset_analysts in Okta, sign them out and back in, and confirm SQL Lab appears. This proves AUTH_ROLES_SYNC_AT_LOGIN is working.
  5. Remove the user from every Superset group in Okta and sign in again. They should now hold only the AUTH_USER_REGISTRATION_ROLE. If you would rather they be refused entirely, remove them from the Okta application assignment instead.

Keep a break-glass path. Switching to AUTH_OAUTH removes the password form, so if Okta is unavailable, nobody can log in. Document the rollback: a copy of the previous superset_config.py with AUTH_DB, a known-good admin account in the metadata database, and the restart command. Test it once before you need it.

Troubleshooting

Symptom Likely cause Fix
Okta shows “The redirect_uri parameter must be a Login redirect URI” The callback URL Superset sent does not match Okta exactly Check the provider name, the scheme (http vs https), and trailing slashes. Enable ENABLE_PROXY_FIX behind a proxy.
mismatching_state: CSRF Warning! State not equal in request and response Session cookie not sent on the callback Set SESSION_COOKIE_SAMESITE = "Lax" and make sure SESSION_COOKIE_SECURE matches the scheme in use.
Login succeeds, but every user gets the Gamma role only Groups claim missing from the userinfo response Confirm the groups claim is configured for the Access Token as well as the ID Token, the groups scope is requested, and you are not using the org authorization server URLs.
“Access is Denied” after signing in User created without roles, or registration disabled Set AUTH_USER_REGISTRATION = True and a valid AUTH_USER_REGISTRATION_ROLE.
invalid_client in Superset logs Wrong client ID or secret, or the app is not a Web Application type Re-copy the credentials; recreate the integration as an OIDC Web Application if needed.
Usernames look like okta_00u1a2b3... FAB’s built-in handler derives the username from the sub claim Add the custom security manager from Step 2 before the first production login.
Two accounts for the same person Username convention changed between logins Pick one of preferred_username or email in oauth_user_info and keep it. Merge or delete the duplicate in List Users.
Roles do not update when Okta groups change Sync disabled Set AUTH_ROLES_SYNC_AT_LOGIN = True and have the user sign out and in.
Login button missing; password form still shown Config not loaded Confirm SUPERSET_CONFIG_PATH points to the file, or the file is on PYTHONPATH, and that Superset was actually restarted.

To see exactly what Okta returned, run Superset with debug logging for a single login using the log.debug line in the custom security manager above. If you need the claim values and not just their names, log the full payload once and remove it immediately afterwards; the response contains personal data.

Operational notes

  • Onboarding is now an Okta task. Add the person to the right group and assign them the application. There is nothing to do in Superset.
  • Offboarding is two steps. Deactivate in Okta, then either wait for PERMANENT_SESSION_LIFETIME to expire or, for immediate effect, set the user to inactive in Superset’s List Users.
  • Role grants must happen in Okta. With AUTH_ROLES_SYNC_AT_LOGIN enabled, editing a user’s roles in the Superset UI lasts only until their next login. Change the Okta group instead.
  • Service accounts and API clients that authenticate with a username and password against Superset’s REST API will stop working under AUTH_OAUTH. Move them to a token-based approach or keep a separate, restricted provider for them.
  • Multiple providers are allowed. OAUTH_PROVIDERS is a list. Some teams keep Okta for staff and a second provider for contractors or an embedded-analytics tenant.
  • Audit trail. Superset’s own logs record the username on each request. With SSO, those usernames are guaranteed to be real identities, which is what your auditor was after in the first place.

Related guides

The same AUTH_OAUTH mechanics apply to every identity provider; what changes is the provider block, the claims and how groups are exposed.

Once logins work, the next question is what each role can see. Superset RBAC design for a 500-user enterprise covers the roles your Okta groups should map to.

Frequently Asked Questions

Does Apache Superset support Okta SSO out of the box?

Yes. Okta is an AUTH_OAUTH provider, and Flask-AppBuilder, which handles Superset's authentication, ships a handler for it, so a standard setup works without custom code. It is still worth adding a small custom security manager before the first production login: the built-in handler derives usernames from the sub claim, which produces names like okta_00u1a2b3... instead of a readable username or email.

Why does Okta login fail with a redirect URI mismatch or mismatching_state error?

Both usually come from running behind a reverse proxy. Without ENABLE_PROXY_FIX, Superset builds an http:// callback URL that does not match the https:// one registered in Okta. A mismatching_state error means the session cookie was not sent on the callback, most often because SESSION_COOKIE_SAMESITE is set to Strict; use Lax.

Why does every user get only the Gamma role after signing in with Okta?

The groups claim is missing from the userinfo response, so there is nothing for AUTH_ROLES_MAPPING to map. Configure the groups claim for the Access Token as well as the ID Token, request the groups scope, and use a custom authorization server rather than the org authorization server URLs.

Does deactivating a user in Okta log them out of Superset?

No. It stops new logins immediately, but sessions Superset has already issued stay valid until PERMANENT_SESSION_LIFETIME expires. For immediate effect, also set the user to inactive in Superset's List Users.

Build It With Andolasoft

SSO is one control in a production Superset setup. It sits alongside role design, row-level security, network exposure, metadata database backups, and a patching cadence. If you are putting Superset in front of a wider audience, or an audit is on the calendar, it is worth reviewing all of those together rather than one at a time.

Our Superset Architecture Review is a fixed-scope, five-day review of exactly that: authentication and SSO, RBAC and RLS, caching and async queries, upgrade readiness and dashboard performance, delivered as a written report with prioritised fixes. If you would rather someone else kept the platform patched and monitored, that is what Managed Support is for.

For the wider set of controls, see our earlier post on data governance and security best practices for Superset deployments.

To put Superset behind Okta or another identity provider without the trial and error, contact us.

How to Build a Custom Chart Plugin for Apache Superset 4.x

Apache Superset ships with more than fifty chart types, and for most dashboards that is plenty. Then someone asks for a bullet chart against a target band, a Sankey with a custom node order, a map layer the built-in deck.gl charts do not offer, or a KPI tile that colours itself against three thresholds instead of one. At that point you have two options: bend an existing chart until it almost fits, or write a plugin.Plugins are how Superset itself is built. Every chart in the Explore view, from the humble table to the ECharts time series, is a plugin registered through the same ChartPlugin API you are about to use. Nothing about a custom plugin is second-class. It gets the same query layer, the same control panel framework, the same dashboard filters and cross-filters, and the same theming.

This guide builds a small but complete plugin for Superset 4.x. The chart is deliberately simple, a bar per category with a configurable highlight threshold, so that the plugin mechanics stay in focus. Swap the rendering for ECharts, D3, or deck.gl once the plumbing is in place.

What a plugin is made of

A Superset chart plugin is an npm package that exports a class extending ChartPlugin from @superset-ui/core. The class wires together five things:

Piece File Job
Metadata index.ts Name, description, thumbnail, category, tags, and behaviours shown in the chart picker
Query builder buildQuery.ts Turns the form data from the control panel into one or more query objects for Superset’s backend
Control panel controlPanel.ts Declares which controls appear in Explore and how they are grouped
Props transformer transformProps.ts Converts raw query results and form data into the props your component needs
Component HelloChart.tsx The React component that draws the chart

The flow at runtime is: the user changes a control, Superset runs buildQuery, sends the query to the backend, receives rows, calls transformProps with those rows plus the form data, and renders your component with the result. Controls flagged as renderTrigger skip the query and go straight to transformProps, which is how colour and label changes stay instant.

Prerequisites

  • Node.js at the version your Superset release pins. Read the engines field in superset-frontend/package.json at the tag you deploy rather than trusting a blog post: the 4.x line started on Node 18 and later releases accept Node 20 as well. Use nvm or fnm; a mismatched Node version is the most common cause of a build that fails for no obvious reason.
  • A checkout of the Superset repository at the exact tag you run in production, for example git clone --branch 4.1.1 https://github.com/apache/superset.git. You will run the frontend dev server from it and, later, build the production image from it.
  • A running Superset backend to develop against. The repo’s docker-compose setup works, or a local superset run -p 8088 --with-threads --reload --debugger.
  • Working knowledge of React and TypeScript. Plugins are TypeScript by default and there is no reason to fight that.

Step 1: Scaffold the plugin

Superset maintains a Yeoman generator that produces a working plugin skeleton. Install it and run it in a new directory next to, not inside, your Superset checkout:

bash
npm install -g yo @superset-ui/generator-superset

mkdir superset-plugin-chart-hello
cd superset-plugin-chart-hello
yo @superset-ui/superset

Answer the prompts: choose Chart plugin, accept the package name, add a one-line description, and pick Regular as the chart type (choose Time-series if your chart has a time axis; it changes the default controls). The generator writes a package.json, TypeScript config, Jest setup, a src/ folder with the five files above, and a src/images/thumbnail.png placeholder.

If the published generator lags behind the Superset version you are targeting, run it from your checkout instead:

bash
cd superset/superset-frontend/packages/generator-superset
npm install
npm link
cd ../../../../superset-plugin-chart-hello
yo @superset-ui/superset

Open package.json and check the peerDependencies. The generator pins @superset-ui/core and @superset-ui/chart-controls to the versions in the checkout you ran it from. These must match the Superset you deploy, or the plugin will compile against one API and run against another.

Step 2: The five files

The generated code works as-is. The point of walking through each file is to know what to change when your chart needs something different.

index.ts: metadata and wiring

typescript
import { t, ChartMetadata, ChartPlugin } from '@superset-ui/core';
import buildQuery from './buildQuery';
import controlPanel from './controlPanel';
import transformProps from './transformProps';
import thumbnail from './images/thumbnail.png';

export default class HelloChartPlugin extends ChartPlugin {
  constructor() {
    const metadata = new ChartMetadata({
      name: t('Hello Chart'),
      description: t('One bar per category, with bars above a threshold highlighted.'),
      thumbnail,
      category: t('Custom'),
      tags: [t('Comparison'), t('Custom')],
    });

    super({
      buildQuery,
      controlPanel,
      loadChart: () => import('./HelloChart'),
      metadata,
      transformProps,
    });
  }
}

loadChart is a dynamic import so the component is code-split and only downloaded when someone opens a dashboard that uses it. Wrap every user-visible string in t() so it goes through Superset’s translation layer.

Note what is not here: a behaviors array. Adding Behavior.InteractiveChart tells Superset the chart emits cross-filters, and it does put cross-filter controls in the UI, but the affordance does nothing until your component actually calls setDataMask, which Superset passes in through chartProps.hooks. Declaring the behaviour before you wire the hook produces a menu item that silently fails. Add the behaviour and the hook together, or neither. Dashboard native filters apply to your chart either way; they arrive as part of the query, not through this flag.

buildQuery.ts: from form data to a query

typescript
import { buildQueryContext, QueryFormData } from '@superset-ui/core';

export default function buildQuery(formData: QueryFormData) {
  const { cols: groupby } = formData;
  return buildQueryContext(formData, baseQueryObject => [
    {
      ...baseQueryObject,
      groupby,
    },
  ]);
}

buildQueryContext assembles a query object from the standard controls (metrics, filters, row limit, time range) and hands it to your callback. You return an array of query objects; one is normal, two or more is how charts like the big number with trendline fetch both a total and a series. The generator names the group-by control cols and maps it onto the query’s groupby. Recent Superset versions also accept columns; either works on 4.x.

controlPanel.ts: what the user can change

typescript
import { t, validateNonEmpty } from '@superset-ui/core';
import {
  ControlPanelConfig,
  sharedControls,
} from '@superset-ui/chart-controls';

const config: ControlPanelConfig = {
  controlPanelSections: [
    {
      label: t('Query'),
      expanded: true,
      controlSetRows: [
        [
          {
            name: 'cols',
            config: {
              ...sharedControls.groupby,
              label: t('Category column'),
              description: t('One bar per distinct value'),
            },
          },
        ],
        [
          {
            name: 'metrics',
            config: {
              ...sharedControls.metrics,
              validators: [validateNonEmpty],
            },
          },
        ],
        ['adhoc_filters'],
        ['row_limit'],
      ],
    },
    {
      label: t('Hello Chart options'),
      expanded: true,
      controlSetRows: [
        [
          {
            name: 'threshold',
            config: {
              type: 'TextControl',
              isInt: true,
              default: 0,
              renderTrigger: true,
              label: t('Highlight threshold'),
              description: t('Bars at or above this value are highlighted'),
            },
          },
        ],
        [
          {
            name: 'highlight_color',
            config: {
              type: 'ColorPickerControl',
              default: { r: 26, g: 169, b: 202, a: 1 },
              renderTrigger: true,
              label: t('Highlight colour'),
            },
          },
        ],
      ],
    },
  ],
};

export default config;

Two things to notice. First, sharedControls gives you the same metric, group-by and filter controls every built-in chart uses, so the Explore experience is consistent. Second, renderTrigger: true on the threshold and colour controls means changing them re-renders without re-querying the database. Anything that only affects drawing should be a render trigger; anything that changes what data comes back should not.

The generator’s template may also import a sections helper and open the panel with a time section such as sections.legacyRegularTime. Whether that export exists depends on the release you pin: the time controls were reworked across the 4.x line as the generic chart axes behaviour became the default. Check what your @superset-ui/chart-controls actually exports before importing it, because a missing export takes out the whole control panel rather than one control. The config above needs no time section at all; adhoc_filters covers time filtering.

Control names are snake_case here. They arrive in transformProps as camelCase (highlight_color becomes highlightColor), because ChartProps runs the form data through a camelCase conversion and keeps the original on rawFormData. This conversion is the single most common source of “my control value is undefined”.

transformProps.ts: shaping data for the component

typescript
import { ChartProps, DataRecord } from '@superset-ui/core';

export interface HelloChartProps {
  width: number;
  height: number;
  data: DataRecord[];
  categoryColumn: string;
  metricLabel: string;
  threshold: number;
  highlightColor: string;
}

export default function transformProps(chartProps: ChartProps): HelloChartProps {
  const { width, height, formData, queriesData } = chartProps;
  const { cols, metrics, threshold, highlightColor } = formData;

  const data = (queriesData[0]?.data ?? []) as DataRecord[];
  const metric = metrics?.[0];
  const metricLabel =
    typeof metric === 'string' ? metric : metric?.label ?? 'value';
  const rgba = highlightColor
    ? `rgba(${highlightColor.r}, ${highlightColor.g}, ${highlightColor.b}, ${highlightColor.a})`
    : '#1aa9ca';

  return {
    width,
    height,
    data,
    categoryColumn: Array.isArray(cols) ? cols[0] : cols,
    metricLabel,
    threshold: Number(threshold) || 0,
    highlightColor: rgba,
  };
}

queriesData is an array with one entry per query object you returned from buildQuery. Each entry has a data array of row objects keyed by column or metric label. Metrics can be plain strings (saved metrics) or ad-hoc metric objects with a label; handle both. Keep this function pure and cheap; it runs on every render trigger.

HelloChart.tsx: the component

tsx
import React from 'react';
import { styled } from '@superset-ui/core';
import { HelloChartProps } from './transformProps';

const Wrapper = styled.div<{ height: number; width: number }>`
  height: ${({ height }) => height}px;
  width: ${({ width }) => width}px;
  box-sizing: border-box;
  display: flex;
  align-items: stretch;
  gap: 6px;
  padding: 8px;
  font-family: ${({ theme }) => theme.typography.families.sansSerif};
`;

/* One column per row: bar area on top, label pinned underneath. */
const Column = styled.div`
  flex: 1 1 0;
  min-width: 0;
  display: flex;
  flex-direction: column;
`;

/* Gives the bar a definite height to take a percentage of. */
const BarArea = styled.div`
  flex: 1 1 auto;
  min-height: 0;
  display: flex;
  align-items: flex-end;
`;

const Bar = styled.div<{ pct: number; color: string }>`
  width: 100%;
  height: ${({ pct }) => pct}%;
  background-color: ${({ color }) => color};
  border-radius: 2px 2px 0 0;
`;

const Label = styled.div`
  flex: 0 0 auto;
  padding-top: 4px;
  font-size: 11px;
  text-align: center;
  white-space: nowrap;
  overflow: hidden;
  text-overflow: ellipsis;
`;

export default function HelloChart({
  width,
  height,
  data,
  categoryColumn,
  metricLabel,
  threshold,
  highlightColor,
}: HelloChartProps) {
  const max = Math.max(1, ...data.map(row => Number(row[metricLabel]) || 0));

  return (
    <Wrapper width={width} height={height}>
      {data.map(row => {
        const value = Number(row[metricLabel]) || 0;
        const pct = (value / max) * 100;
        const hot = value >= threshold;
        const category = String(row[categoryColumn]);
        return (
          <Column key={category} title={`${category}: ${value}`}>
            <BarArea>
              <Bar pct={pct} color={hot ? highlightColor : '#ccc'} />
            </BarArea>
            <Label>{category}</Label>
          </Column>
        );
      })}
    </Wrapper>
  );
}

The nesting is worth a moment, because it is the part people get wrong first. A percentage height only resolves against a parent with a definite height. Wrapper gets one from the pixel height Superset hands it, and BarArea gets one from being a flex child of Wrapper, so height: ${pct}% on the bar works. Put that percentage directly inside an auto-height div and every bar collapses to nothing.

Otherwise this is plain HTML and CSS on purpose. It has no chart library dependency, it is trivially testable, and it demonstrates the two things every component must do: fill the width and height Superset gives it, and read its theme from @superset-ui/core rather than hard-coding fonts. For anything more demanding, look at how @superset-ui/plugin-chart-echarts wraps ECharts, or how the deck.gl plugins handle WebGL. The pattern is the same; only the drawing changes.

This chart type more involved than a tutorial covers?

If your plugin needs custom interactions, non-standard data shapes, or has to survive the next major-version bump, a Superset Plugin Scoping Call gets you a build estimate before you sink a sprint into it.

Book a Plugin Scoping Call

Step 3: Run it inside Superset

The plugin has to be part of the Superset frontend bundle. Superset does carry an experimental DYNAMIC_PLUGINS feature flag that fetches a plugin from a URL at runtime, but it has stayed experimental for years and nothing in the dashboard experience is built around it, so treat compiling into the bundle as the supported path.

The package’s entry point is its build output, not its source, so build it before linking:

bash
cd superset-plugin-chart-hello
npm i --force
npm run build

The --force is there because the generator’s peer dependency ranges rarely resolve cleanly against a single Superset checkout. Then link the package into the Superset frontend:

bash
cd ../superset/superset-frontend
npm i -S ../../superset-plugin-chart-hello

Then open src/visualizations/presets/MainPreset.js and add the plugin alongside the built-ins:

javascript
import HelloChartPlugin from 'superset-plugin-chart-hello';

// ... inside the plugins array passed to super()
new HelloChartPlugin().configure({ key: 'hello_chart' }),

The key is the chart’s viz_type. It is stored on every saved chart that uses the plugin, so choose it once and never change it.

Now run three processes: the backend, the Superset dev server, and a watch build for the plugin.

bash
# terminal 1, from the repo root with your virtualenv active
superset run -p 8088 --with-threads --reload --debugger

# terminal 2
cd superset/superset-frontend
npm run dev-server

# terminal 3, in the plugin directory
npm run dev

That third terminal is not optional. Superset resolves the linked package through its main field, which points at compiled output, so editing src/HelloChart.tsx changes nothing until the plugin is rebuilt. npm run dev is the generator’s watch build; check the scripts block in your package.json if the name differs. Without it you will edit code for twenty minutes and conclude that hot reloading is broken.

Open http://localhost:9000, create a chart, and search for “Hello Chart” in the picker. Pick a dataset, a category column and a metric, and you should see bars. Change the threshold and watch the bars recolour without a spinner, which confirms the render trigger is wired correctly.

If the dev server does not pick up a rebuilt plugin, restart it; watching across a symlink is occasionally flaky on Windows and in Docker volumes.

Step 4: Getting it into production

Because the plugin is compiled into the bundle, production means building Superset’s frontend with your plugin included. The official apache/superset image does not contain the frontend source, so you build from the repository at the tag you deploy:

  • In your Superset checkout, add the plugin dependency to superset-frontend/package.json and the registration line in MainPreset.js. Use a git URL or a private registry entry, not the relative path you developed against: the plugin directory sits outside the Docker build context, so a relative dependency fails at npm ci rather than merely being untidy. Commit both changes on a branch named for the Superset version, for example 4.1.1-acme.
  • Build the image from the repo root: docker build -t registry.example.com/superset:4.1.1-acme .. The Dockerfile’s frontend build stage runs npm ci and the frontend build, which now includes your plugin.
  • Deploy that image in place of the official one. Nothing else changes: same configuration, same metadata database, same Helm chart or compose file.

When you upgrade Superset, rebase the branch onto the new tag, bump the plugin’s @superset-ui/* peer dependencies to match, rebuild, and run the plugin’s tests. Budget half a day for a minor version and more for a major one; the ChartPlugin API is stable, but control-panel helpers and theme tokens do move.

Step 5: Tests worth writing

The generator sets up Jest. Three tests pay for themselves immediately:

  • transformProps with a realistic ChartProps fixture: assert the metric label resolution for both string and ad-hoc metrics, the camelCase control names, and the empty queriesData case.
  • buildQuery with sample form data: assert the query object contains the expected groupby and metrics, so a control rename does not silently produce an empty query.
  • The component with React Testing Library: render with three rows, assert three bars, and assert the highlighted count for a given threshold.

Superset’s frontend also has a Storybook (superset-frontend/storybook). Adding a story for your plugin gives designers and stakeholders a place to look at it without a running backend.

Pitfalls that cost time

  • Peer dependency drift. @superset-ui/core in your plugin must be the version the Superset frontend uses. Two copies of the library in one bundle produce baffling errors about themes or registries being undefined.
  • Forgetting the plugin’s watch build. The linked package serves compiled output, so source edits are invisible until it rebuilds.
  • camelCase vs snake_case. Controls are defined in snake_case and read in camelCase. Log formData once in transformProps if a value is missing.
  • Forgetting renderTrigger. Every cosmetic control without it forces a database round trip.
  • Declaring behaviours you have not implemented. Behavior.InteractiveChart without a setDataMask call gives users a cross-filter option that does nothing.
  • Percentage sizing inside auto-height containers. Give the parent a definite height or the chart renders empty at full data.
  • Hard-coded colours and fonts. Read them from the theme so the chart looks right in a themed or white-labelled Superset.
  • Changing the viz_type key. Saved charts reference it. Renaming it orphans every chart built on the plugin.
  • Ignoring width and height. Superset tells your component its size. A chart that sizes itself overflows dashboard grid cells.
  • Forking Superset core. Put chart logic in the plugin package, not in the Superset repo. The only lines you should be maintaining in the fork are the dependency and the registration.

Going further

Once the skeleton renders, the next problems tend to arrive in this order:

Frequently Asked Questions

Do I have to fork Superset to add a custom chart plugin?

Not for the chart itself. The plugin lives in its own npm package, and that is where all of its logic belongs. It does have to be compiled into the Superset frontend bundle, because the DYNAMIC_PLUGINS flag is still experimental, so you keep a branch of Superset at your production tag with two small changes: the plugin dependency in superset-frontend/package.json and its registration in MainPreset.js.

What files make up a Superset chart plugin?

Five: index.ts for metadata and wiring, buildQuery.ts to turn form data into a query, controlPanel.ts to declare the Explore controls, transformProps.ts to shape query results into props, and the React component that draws the chart.

Why does changing a control re-run the database query?

Because the control is not marked renderTrigger: true. Controls without it go back through buildQuery and the backend; controls with it skip the query and go straight to transformProps. Anything that only affects drawing, such as colours, labels or thresholds, should be a render trigger.

What happens to my plugin when I upgrade Superset?

Rebase your Superset branch onto the new tag, bump the plugin's @superset-ui/* peer dependencies to match, rebuild, and run the plugin's tests. The ChartPlugin API is stable, but control-panel helpers and theme tokens do move, so budget half a day for a minor version and more for a major one.

Build It With Andolasoft

The mechanics above are the same ones behind the plugins we have written up on this blog: a dual-axis line chart for Superset 4 that plots two measures on independent axes and takes part in cross-filtering, and a multi-threshold heatmap for Superset 4.1 that colours cells against several hard limits instead of one gradient. Both started as exactly the skeleton in this post.

If you have a chart in mind and want to know what it would take, our Plugin Scoping Call is a free 45-minute session with a plugin engineer. You describe the visualisation, we walk through the data shape and interactions, and within 48 hours you get a written scope, effort estimate, and timeline you can act on with or without us. The wider service is described on our Superset plugin development page.

To talk through a chart you need built, or a plugin that has stopped working after an upgrade, contact us.

Digital Transformation and Its Influence on Customer Satisfaction

With the rise of digital technologies and changing consumer behaviors, companies are forced to rethink how they engage with their audiences.

Digital transformation has emerged as a powerful catalyst in reshaping customer experience (CX) by harnessing innovative tools, data-driven insights, and streamlined processes.

In this blog, we’ll explore digital transformation’s profound impact on customer experience, uncovering how businesses can leverage technology to meet and exceed modern customer expectations.

Understanding Digital Transformation

Digital transformation is more than just adopting new technology—it’s a holistic shift in how businesses operate, deliver value, and interact with their customers.

At its core, digital transformation integrates digital technology into every facet of an organization, fundamentally changing the way it runs and how customers experience its services.

This process involves rethinking traditional models, embracing agile methodologies, and creating new strategies centered around the customer.

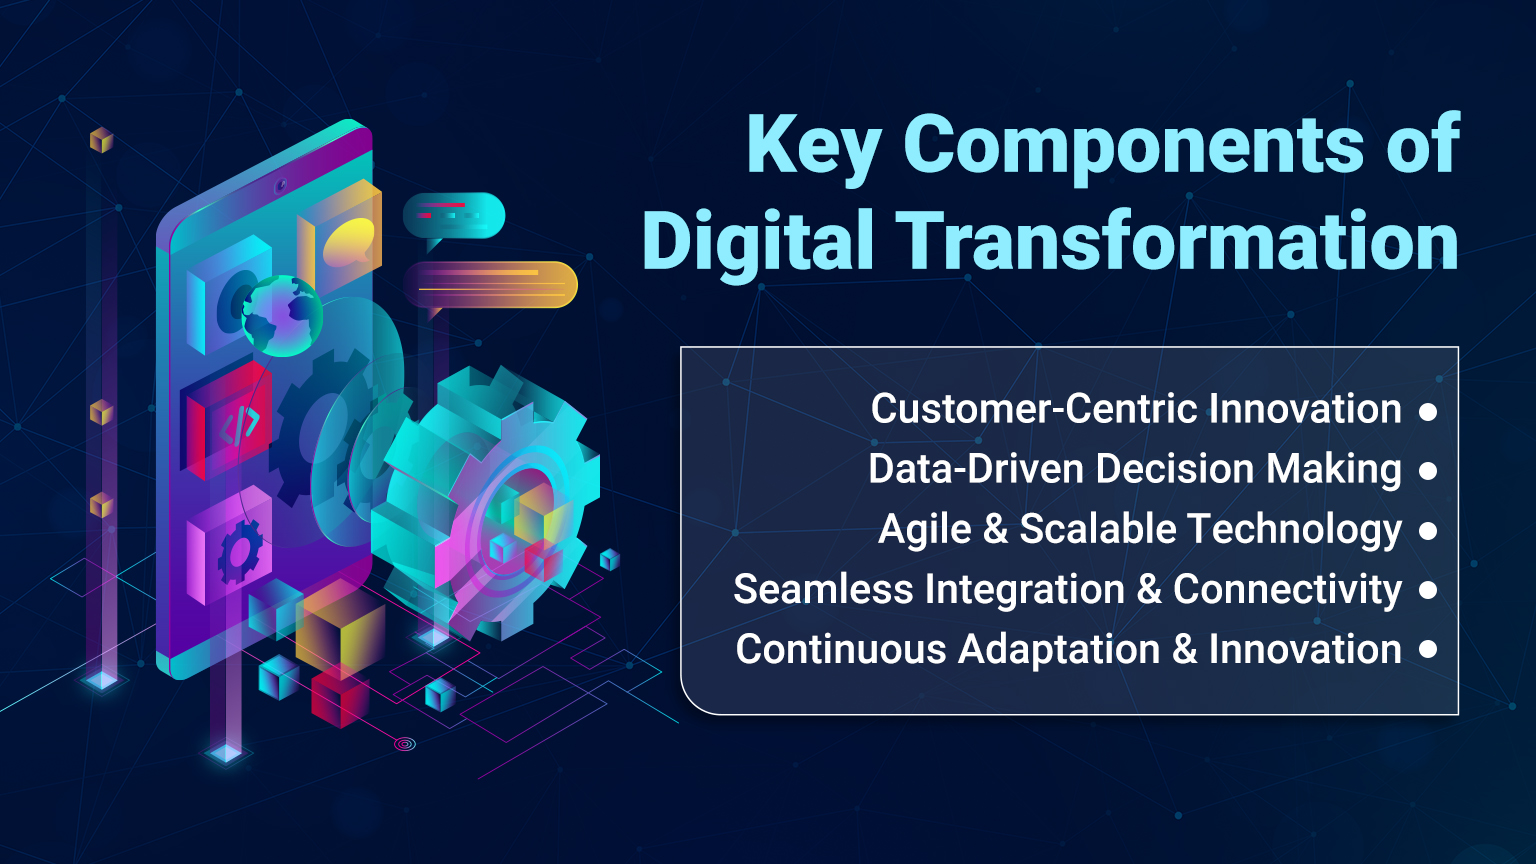
Key Components of Digital Transformation

Key Components of Digital Transformation

  • Adoption of Advanced Technologies: Businesses integrate cutting-edge tools such as cloud computing, artificial intelligence (AI), machine learning (ML), big data analytics, and the Internet of Things (IoT) to streamline operations and enhance customer interactions.
  • Process Automation: Automating repetitive tasks allows organizations to improve efficiency and reduce human error, freeing up valuable resources to focus on innovation and customer engagement.
  • Data-Driven Decision Making: Leveraging analytics and real-time data enables companies to better understand customer behavior, predict trends, and tailor their strategies accordingly.
  • Cultural Change: A successful digital transformation requires an organizational culture that embraces change, encourages continuous learning, and prioritizes the customer at every level.

The Changing Landscape of Customer Experience

Customer experience has become the new battleground for competitive differentiation.
Today’s consumers expect seamless, personalized, and responsive interactions across every touchpoint—whether it’s online, in-store, or on mobile devices.

Digital transformation empowers businesses to create a unified, omnichannel experience that meets these expectations.

Personalization at Scale

One of the most significant advantages of digital transformation is the ability to deliver personalized experiences.

Through advanced data analytics, companies can gain deep insights into customer preferences, behaviors, and purchase history. This wealth of information enables them to:

  • Tailor Content and Offers: By understanding customer interests, businesses can create highly targeted marketing campaigns and deliver content that resonates with individual needs.
  • Enhance Product Recommendations: AI-powered recommendation engines analyze past behavior to suggest products or services that are most likely to appeal to the customer, increasing engagement and conversion rates.
  • Improve Customer Journeys: Personalized interactions across multiple channels ensure that customers receive consistent and relevant messaging, leading to improved satisfaction and loyalty.

Omnichannel Engagement

In an era where customers interact with brands across various platforms, delivering a seamless omnichannel experience is crucial.

Digital transformation allows businesses to integrate their online and offline channels, ensuring a smooth transition for customers as they move from one touchpoint to another.

Benefits include:

  • Unified Customer Profiles: By consolidating data from various channels, companies can build comprehensive customer profiles that enhance personalization and service quality.
  • Consistent Messaging: Omnichannel strategies ensure that customers receive the same level of service and messaging, whether they are shopping online, using a mobile app, or visiting a brick-and-mortar store.
  • Improved Customer Support: Integrated platforms allow for real-time communication and support across multiple channels, such as chatbots, social media, and email, ensuring that customer issues are resolved quickly and efficiently.

Enhanced Interactivity and Engagement

Digital technologies have transformed how customers interact with brands. Interactive tools, such as chatbots, virtual assistants, and augmented reality (AR), have become integral components of modern customer engagement strategies.

These tools offer several advantages:

  • Instant Support: Chatbots and virtual assistants provide immediate responses to customer queries, reducing wait times and improving overall satisfaction.
  • Immersive Experiences: Technologies like AR and virtual reality (VR) enable customers to experience products and services in a more engaging way, which can be particularly effective in retail and real estate.
  • Empowered Self-Service: Digital platforms allow customers to access information, manage their accounts, and resolve issues independently, fostering a sense of empowerment and satisfaction.

How Digital Transformation Enhances Customer Experience

1. Real-Time Data and Predictive Analytics

Digital transformation equips businesses with the tools to collect and analyze data in real-time. This continuous flow of data allows companies to:

  • Monitor Customer Behavior: Understand how customers interact with their brand and identify trends or issues as they arise.
  • Predict Future Needs: Use predictive analytics to forecast customer behavior and proactively address needs before they become problems.
  • Optimize Marketing Efforts: Refine marketing strategies based on real-time performance data, ensuring that campaigns are always aligned with customer interests and market trends.

2. Automation for Efficiency and Accuracy

Automation plays a critical role in streamlining processes and reducing human error. By automating routine tasks, businesses can improve the customer experience in several ways:

  • Faster Response Times: Automated systems, such as chatbots and automated email responders, ensure that customer inquiries are addressed promptly, even outside of business hours.
  • Consistent Quality: Automation ensures that processes are executed uniformly, resulting in a consistent customer experience across all interactions.
  • Resource Optimization: By automating mundane tasks, employees are free to focus on complex customer issues and creative problem-solving, leading to higher-quality service.

3. Improved Customer Relationship Management (CRM)

Digital transformation has revolutionized the way companies manage customer relationships. Modern CRM systems are equipped with advanced features that enable businesses to:

  • Track Interactions: Maintain detailed records of customer interactions, preferences, and feedback, ensuring that every touchpoint is informed by past experiences.
  • Segment Audiences: Analyze customer data to segment audiences and tailor communications to different groups, improving relevance and engagement.
  • Measure Customer Satisfaction: Implement tools to monitor customer satisfaction in real-time, allowing for swift action when issues are detected.

4. Seamless Integration of Communication Channels

The integration of various communication channels is essential for delivering a holistic customer experience. Digital transformation enables seamless integration, which results in:

  • Enhanced Connectivity: Customers can interact with a brand through their preferred channels—whether it’s social media, email, live chat, or phone—without experiencing disruptions.
  • Coordinated Support: Integrated systems ensure that customer support teams have access to all relevant information, leading to more informed and effective service.
  • Feedback Loops: Consistent communication channels create efficient feedback loops, allowing companies to gather customer insights and continuously refine their strategies.

Challenges and Considerations in Digital Transformation

While the benefits of digital transformation for customer experience are substantial, businesses must also navigate several challenges to ensure a successful transition.

Overcoming Technological Hurdles

  • Legacy Systems: Many organizations still rely on outdated systems that are not compatible with modern digital tools. Transitioning from these legacy systems to new platforms requires careful planning and investment.
  • Data Integration: Aggregating data from various sources and ensuring its accuracy can be complex. Companies must invest in robust data management systems to maintain data integrity.
  • Cybersecurity: With increased digitization comes the heightened risk of cyber threats. Businesses must prioritize cybersecurity measures to protect sensitive customer information and build trust.

Managing Organizational Change

  • Cultural Resistance: Shifting to a digital-first mindset can be challenging, particularly in organizations with deeply entrenched traditional practices. It requires strong leadership and a commitment to fostering a culture of innovation.
  • Skill Gaps: Digital transformation often demands new skill sets that may not be present within the current workforce. Investing in training and development is essential to equip employees with the necessary skills.
  • Resource Allocation: Implementing digital transformation initiatives can be resource-intensive. Organizations must balance their budgets and ensure that investments in technology yield a positive return on investment (ROI).

Ensuring a Customer-Centric Approach

  • Balancing Automation and Human Touch: While automation enhances efficiency, customers still value personal interactions. Striking the right balance between automated processes and human engagement is critical.
  • Continuous Improvement: The digital landscape is constantly evolving, and so are customer expectations. Businesses must adopt an agile approach, continually assessing and updating their digital strategies to stay relevant.
  • Feedback Mechanisms: Implementing robust feedback mechanisms is vital. Companies need to listen to their customers and adjust their digital strategies based on their experiences and expectations.

Case Studies: Real-World Examples of Digital Transformation in Action

Retail Sector: Enhancing the In-Store and Online Experience

A major retail chain underwent a digital transformation by integrating its online and offline channels. By implementing an omnichannel strategy, the company was able to:

  • Provide personalized product recommendations both online and in-store.
  • Use real-time data to manage inventory more efficiently.
  • Offer mobile payment options and self-checkout kiosks to streamline the shopping experience.

As a result, customer satisfaction increased significantly, and the retailer saw a boost in both online and in-store sales.

Financial Services: Streamlining Customer Interactions

A leading bank embraced digital transformation by deploying AI-powered chatbots and advanced CRM systems. These tools enabled the bank to:

  • Offer 24/7 customer support through virtual assistants.
  • Analyze customer data to personalize financial advice and product offerings.
  • Automate routine transactions, reducing wait times and improving service accuracy.

This transformation led to improved customer engagement and loyalty, with customers enjoying faster and more personalized service.

Healthcare: Transforming Patient Engagement

Digital transformation has had a profound impact on the healthcare industry, particularly in enhancing patient engagement. A healthcare provider implemented a digital platform that allowed patients to:

  • Schedule appointments and access medical records online.
  • Receive personalized health recommendations based on their medical history.
  • Engage with healthcare professionals through telemedicine services.

This approach not only improved patient satisfaction but also led to better health outcomes, as patients could receive timely care and advice from the comfort of their homes.

The Future of Customer Experience in a Digital World

As technology continues to evolve, the landscape of customer experience will become even more dynamic and interconnected. Here are some trends that are likely to shape the future of CX:

  • Artificial Intelligence and Machine Learning

The integration of AI and ML will further enhance personalization by continuously learning from customer interactions. These technologies will enable businesses to anticipate customer needs and provide hyper-personalized experiences in real-time.

  • Augmented Reality and Virtual Reality

Immersive technologies like AR and VR will revolutionize the way customers experience products and services. From virtual try-ons in fashion retail to immersive property tours in real estate, these tools will make customer engagement more interactive and memorable.

  • 5G Connectivity and the Internet of Things

With the rollout of 5G, the speed and reliability of digital connections will improve dramatically, paving the way for more seamless digital experiences. Coupled with IoT devices, businesses will be able to gather even more data and offer services that are finely tuned to customer needs in real-time.

  • Voice-Activated Technologies

Voice assistants and smart speakers are becoming increasingly popular. As these technologies mature, they will provide yet another channel for customer interaction, enabling hands-free, voice-driven experiences that add convenience and accessibility.

  • Enhanced Security and Data Privacy

As digital transformation progresses, customer trust will hinge on robust security measures. Future innovations will likely focus on integrating advanced security protocols and ensuring transparency in data usage, which will further strengthen customer relationships.

Strategies for Success: Implementing Digital Transformation for Better CX

For organizations looking to harness digital transformation to improve customer experience, here are some strategies to consider:

1. Start with a Clear Vision

Define what you want to achieve with digital transformation. Set clear, measurable goals related to customer experience, whether it’s reducing response times, improving personalization, or enhancing overall satisfaction.

2. Invest in the Right Technologies

Identify the tools and platforms that align with your business objectives. Whether it’s CRM systems, AI-powered analytics, or omni-channel communication platforms, make sure your technology stack is scalable and secure.

3. Prioritize Data Integration and Analytics

Data is the backbone of digital transformation. Invest in systems that can collect, integrate, and analyze data from multiple sources. This will enable you to derive actionable insights and refine your strategies in real-time.

4. Foster a Customer-Centric Culture

Ensure that every level of your organization is aligned to enhance customer experience. Training programs, clear communication, and leadership support are essential to foster a culture that embraces change and prioritizes the customer.

5. Monitor, Measure, and Iterate

Digital transformation is an ongoing process. Continuously monitor key performance indicators (KPIs) related to customer experience, gather feedback, and be prepared to iterate on your strategies. Use tools such as customer satisfaction surveys and real-time analytics to track progress and identify areas for improvement.

Conclusion

Digital transformation has fundamentally redefined what customer experience means in the modern era.

By leveraging advanced technologies, automating processes, and harnessing the power of data, companies can create personalized, seamless, and engaging experiences that not only meet but exceed customer expectations.

While the journey toward full digital transformation comes with its challenges—such as integrating legacy systems, ensuring data security, and managing organizational change—the rewards are clear: enhanced customer satisfaction, increased loyalty, and ultimately, stronger business performance.

As we move forward into an increasingly digital future, businesses that embrace digital transformation will be best positioned to adapt to evolving customer needs and stay ahead of the competition.

Securing Mobile Apps: How to Keep User Data Safe from Cyber Attacks

Mobile usage has become ubiquitous. When you download a mobile app, and enter your details the mobile app should be designed to prevent any data heist.

Today, many industries are booming such as banking, healthcare, eCommerce, and social media which has never been more critical.

Cybercriminals are ceaselessly trying to find new ways to exploit vulnerabilities, and a single data breach can ruin a company’s reputation and cost millions.

Hence, during mobile app development, you must ensure that your app is secure, trustworthy, and compliant with the latest data protection regulations.

Today, in this guide we will break down the best practices for mobile app security which will help you protect user data and build secure future-proof applications.

Understanding Mobile App Security Risks

Understanding Mobile App Security Risks

Before you jump into the best practices, let’s first understand the most common security threats:

Common Mobile App Security Threats:

  • Data Leaks: Weak encryption and insecure data storage can expose user data to hackers.
  • Man-in-the-Middle (MITM) Attacks: Attackers can steal data when it is transferred between users and servers.
  • Malware and Spyware: Using malicious applications can inject harmful code to steal data.
  • Weak Authentication: Poor password policies and lack of multi-factor authentication can make data access vulnerable.
  • Reverse Engineering: Attackers can analyze application code to find vulnerabilities and create fraudulent versions.
  • Session Hijacking: They can steal user sessions and get unauthorized access.
  • API Exploits: Vulnerable APIs can create entry points for cybercriminals.

Why Does Mobile App Security Matter?

  • User Trust: Customers can expect their personal and financial data to be safe.
  • Compliance: Various regulations such as GDPR, HIPAA, and PCI-DSS mandate strict security measures.
  • Financial Impact: Security breaches can cost businesses millions if not billions in revenue loss.

Best Practices for Mobile App Security

1. Secure Code Development

Your application code is your first line of defense. If attackers find your vulnerabilities, then they can exploit loopholes to insert malware and even steal data.

Best Practices:

  • You can use secure coding guidelines such as OWASP mobile security projects
  • code minification and obfuscation can prevent reverse engineering
  • You can also implement code signing to verify authenticity
  • Regularly perform static and dynamic code analysis.

2. Implement Strong Authentication & Authorization

Weak authentication is also one of the biggest security risks in mobile app development

Best Practices:

  • Implement strong password policies
  • Implement multi-factor authentication
  • Use OAuth 2.0 or OpenID Connect for secure authentication
  • Enforce role-based access control

3. Secure Data Storage

Many breaches do occur due to improperly stored user data.

Best Practices:

  • Don’t store sensitive data on the devices unless necessary
  • Use encrypted databases
  • Secure app sandboxing to isolate sensitive data
  • Use Android Keystore and Keychain to securely store credentials

4. Encrypt Data Transmission

Data transfers between the app and server are vulnerable to MITM attacks if not encrypted.

Best Practices:

  • Always use HTTPS with TLS 1.2 or TLS 1.3.
  • Implement SSL pinning to prevent fake certificates from being used in attacks.
  • Use end-to-end encryption (E2EE) for messaging or sensitive transactions.

5. Secure APIs & Backend Communication

APIs are a common target for hackers because they connect apps to databases and other services.

Best Practices:

  • Implement API authentication
  • Validate your API requests
  • Encrypt API responses
  • Regularly scan APIs for vulnerabilities

6. Protect Against Reverse Engineering

Attackers can decompile an application to analyze its code and exploit vulnerabilities.

Best Practices:

  • Obfuscate source code
  • Implement tamper detection mechanisms

7. Secure Third-Party Libraries & SDKs

Some mobile apps can rely on third-party libraries and SDKs which can pose a security risk.

Best Practices:

  • Implement libraries that are updated regularly
  • Scan third-party SDKs for vulnerabilities
  • Minimize unnecessary SDKs

8. Regular Security Testing & Penetration Testing

Security is not a one-time process and needs ongoing testing.

Best Practices:

  • You can conduct regular penetration testing to identify weaknesses
  • Perform automated security scans for vulnerabilities
  • Continuously update security policies to stay ahead of evolving threats

9. Implement Remote Data Wiping

If a user’s device is lost or stolen, then the security feature should not let others access stored data.

Best Practices:

  • Enable remote data wiping
  • Store minimal sensitive data on any device
  • Encrypt data with strong encryption

10. Enforce App Store Security Guidelines

Implement strict security guidelines for app approvals.

Best Practices:

  • Follow Google and Apple security policies
  • Remove APIs that could expose vulnerabilities
  • Ensure regular updates

Conclusion

Rock-solid security in mobile app development is not an option, it’s a necessity. These security features should inculcate trust among users that not a single breach can lead to data or financial loss.

By implementing the best practices as discussed in this guide such as secure coding, encryption, authentication, API security, penetration testing, and more you can build a robust, hacker-proof mobile application.

Security threats will continue to evolve and with continuous monitoring, updates, and proactive security measures you can stay ahead and ensure a safe seamless user experience.

FAQs

Why is mobile app security important?

Mobile app security is essential to protect user data. A Single breach can lead to significant financial and reputational damage.

What are the most common security threats to mobile apps?

Some of the common threats which include data leaks are man-in-the-middle attacks, malware, weak authentication, etc. They can significantly compromise sensitive data and app integrity.

How can I secure the data stored in my mobile app?

Encrypt databases and use secure key storage to avoid unnecessary local storage.

How do I protect my mobile app from reverse engineering?

Use obfuscation tools to implement runtime app self-protection and use various tamper detection mechanisms to prevent attackers.

What is API security, and why does it matter for mobile apps?

API security is crucial because APIs can connect your app to backends and make it a target for hackers. Secure APIs with authentication, encryption, and vulnerability scans.

A Guide to How Google’s AI Overview Impacts SEO?

Artificial intelligence (AI) has been transforming various sectors, and digital marketing is no exception. One of the most significant areas AI impacts is search engine optimization (SEO). This blog delves into AI, its role in SEO, and how businesses can leverage AI to improve their SEO strategies.

What Are AI Overviews?

Google’s AI Overviews are a new search feature that provides users with AI-generated answers to specific queries, appearing above all other search results. 

For example, if you search “how to lose weight,” Google will automatically generate an answer by gathering information from various sources on the web, including links to these sources for more information. 

The goal is to improve the search experience by offering quick answers, so users don’t have to sift through multiple websites.

Initially part of Google’s Search Labs program under the name “Search Generative Experience (SGE),” AI Overviews received positive feedback and became widely available in the U.S. on May 14, 2024. Google plans to expand access to more than a billion people worldwide by the end of 2024.

Why Are Google’s AI-Powered Overviews Important?

AI Overviews are set to transform how Google delivers information, potentially leading to more zero-click searches. 

This means users can find the information they need directly in the AI-powered overview without visiting any websites, impacting the organic (unpaid) traffic for websites ranking below the AI-generated snippet. 

However, if a website’s content is prominently featured or cited in a Google Artificial intelligence summary, it could increase its visibility and click-through rate (CTR).

How AI Overviews Work

AI Overviews appear in search results when Google’s systems determine that generative Artificial intelligence responses can provide particularly helpful information. 

They won’t show up for every query but are used for complex queries that traditionally require multiple searches. 

The content is generated using advanced generative AI technology powered by Google’s Gemini language model, based on its understanding of the query and relevant information gathered across the web.

Optimizing for AI Overviews

While there aren’t specific optimization techniques for AI Overviews yet, following general SEO best practices increases the likelihood of your content being featured. 

Here are some essential SEO techniques and strategies:

  • Focus on High-Quality Content

Quality remains paramount. Google’s algorithms prioritize accurate, original, and valuable content. Ensure your content is well-researched, factually correct, and provides unique insights. This increases the likelihood of being featured in Artificial intelligence overviews.

  • Optimize for Long-Tail Keywords

AI Overviews are often triggered by complex queries, which tend to be long-tail keywords. Optimize your content for these specific, detailed queries to increase your chances of being included in AI-generated summaries.

  • Ensure Crawlability and Indexability

For your content to be considered for artificial intelligence overviews, it must be crawlable and indexable by Google. Use tools like SEMrush’s Site Audit to identify and fix issues such as blocked pages, no-index tags, and 4XX errors.

  • Enhance User Experience

User experience plays a critical role in SEO. Ensure your website loads quickly, is mobile-friendly, and provides secure access to content. A seamless user experience can improve your chances of ranking higher and being featured in artificial intelligence overviews.

  • Utilize On-Page SEO Techniques

Optimize on-page elements like title tags, meta descriptions, URL slugs, and heading tags. Naturally incorporate relevant keywords into your content. These techniques help Google better understand your content, increasing its chances of featuring in artificial intelligence overviews.

  • Build High-Quality Backlinks

Reputable websites’ backlinks signal to Google that your content is trustworthy and valuable. Focus on acquiring high-quality backlinks by reaching out and creating content that others want to link to.

  • Monitor AI Overview Visibility

Use tools like Semrush’s Position Tracking to monitor how often your content appears in artificial intelligence overviews. This data can provide insights into the effectiveness of your SEO strategies and help you make necessary adjustments.

The Impact of AI Overview on SEO

  • Increased Zero-Click Searches

One significant impact of AI Overview is the rise in zero-click searches. Users can get the information they need directly from the AI-generated snippet without visiting any website.

 This can reduce organic traffic to websites, especially those not featured in the AI Overview.

  • Enhanced Visibility for Featured Content

On the flip side, websites featured in AI Overviews can experience increased visibility and higher click-through rates (CTR). 

If your content is cited as a source in an AI Overview, it can attract more qualified traffic, as users who click through are likely already engaged with the topic.

  • Shift in SEO Strategies

SEO strategies must adapt to accommodate the rise of artificial intelligence generated content. Traditional techniques focused solely on ranking for search queries may no longer suffice. 

Instead, SEO professionals need to optimize their content for potential inclusion in artificial intelligence overviews.

Future Trends in AI and SEO

  • AI Advancements: AI technology continually evolves. Future advancements will further refine how Artificial Intelligence overviews are generated and displayed, making it even more crucial for SEO professionals to stay updated with the latest developments.
  • Integration of AI in SEO Tools: Expect to see more AI-powered tools integrated into SEO platforms. These tools can help analyze data, generate insights, and automate optimization processes, making it easier to adapt to changes in search algorithms.
  • Increased Focus on User Intent: Understanding user intent will become even more critical. SEO strategies will need to focus on creating content that not only answers specific queries but also aligns with the overall intent of the user, providing comprehensive and valuable information.

Enhanced Understanding of User Intent

One of the most significant impacts of Google’s AI Overview on SEO is the enhanced understanding of user intent. Traditional keyword-based SEO strategies often fall short in capturing the true intent behind a search query. However, with artificial intelligence powered algorithms, Google can now interpret the context and nuances of a query more effectively.

Key Implications:

  • Semantic Search: AI enables Google to understand the meaning behind words and phrases, leading to more accurate search results. This means that content creators need to focus on providing comprehensive and contextually relevant information rather than just targeting specific keywords.
  • Voice Search Optimization: As voice search continues to rise, AI’s ability to comprehend natural language queries becomes crucial. Websites optimized for conversational language and long-tail keywords will have a competitive edge.

Improved Content Relevance

Google’s AI Overview emphasizes delivering highly relevant content to users. This shift rewards high-quality, informative, and engaging content more than ever before. AI can evaluate content based on various factors, including readability, depth, and user engagement metrics.

Key Implications:

  • Content Quality: Content that provides real value to users will rank higher. Businesses should focus on creating in-depth articles, guides, and resources that address common user questions and pain points.
  • User Engagement: AI can analyze user behavior, such as time spent on a page, bounce rates, and social shares, to determine content relevance. Engaging content that keeps users on the site and encourages interaction will be favored.

Personalization and User Experience

Google’s AI Overview places personalization at its core. AI-driven algorithms analyze user data, preferences, and behavior to deliver tailored search results. This personalization affects various aspects of SEO, such as content recommendations, search snippets, and ad placements.

Key Implications:

  • Customized Search Results: Users will see search results that are more aligned with their interests and past behavior. Businesses should consider segmenting their audience and creating personalized content strategies to cater to different user groups.
  • Enhanced User Experience: Websites that prioritize user experience, with fast load times, mobile optimization, and intuitive navigation, will benefit from higher rankings. AI can assess these factors more accurately, making UX a critical component of SEO.

Evolution of Link Building

Link building has long been a cornerstone of SEO. However, with AI’s involvement, the focus is shifting from quantity to quality. Google’s AI Overview now evaluates the credibility and relevance of backlinks more effectively, reducing the impact of manipulative link-building practices.

Key Implications:

  • Quality Over Quantity: High-quality, authoritative backlinks will have a more significant impact on rankings. Businesses should focus on building genuine relationships and earning links from reputable sources.
  • Content Partnerships: Collaborating with influencers, industry experts, and other businesses to create valuable content can lead to natural and authoritative backlinks.

Adaptation Strategies for Businesses

To thrive in the era of Google’s AI Overview, businesses need to adapt their SEO strategies to align with Artificial intelligence driven search algorithms. Here are some actionable tips:

  • Focus on User Intent: Create content that addresses the underlying intent behind search queries. Use tools like Google’s Keyword Planner and other SEO tools to understand what users are looking for.Invest in Quality Content: Prioritize high-quality, informative, and engaging content that provides real value to users. Regularly update and optimize existing content to keep it relevant.
  • Enhance User Experience: Ensure your website is fast, mobile-friendly, and easy to navigate. Use tools like Google’s Page Speed Insights to monitor and improve site performance.
  • Build Authoritative Links: Focus on earning backlinks from reputable and relevant sources. Avoid manipulative link-building tactics and prioritize genuine content partnerships.
  • Leverage AI Tools: Utilize AI-powered SEO tools and platforms to gain insights into user behavior, keyword trends, and content performance. These tools can help you stay ahead of the competition.

Conclusion

Google’s overview of Artificial Intelligence marks a new era in search engine optimization.

SEO professionals can navigate these changes effectively by understanding the impact of AI-generated content and adopting best practices.

They should focus on creating high-quality content, optimizing for long-tail keywords, enhancing user experience, and strategically using SEO tools to succeed in this AI-driven landscape. Staying informed about advancements in Artificial Intelligence and continuously refining SEO strategies will be essential for maintaining visibility and driving traffic in the age of AI.