How To Optimize WordPress Website for Mobile Devices?

In an era where mobile devices are our constant companions, ensuring your WordPress website is mobile-optimized has become a priority for website owners and developers.

With mobile users constituting a substantial portion of web traffic, the seamless functioning and accessibility of your website on smartphones and tablets are pivotal for maintaining user engagement, boosting search engine rankings, and driving overall success.

In this comprehensive guide, we will dive deep into each step required to effectively mobile-optimize your WordPress site, allowing you to tap into the ever-expanding mobile audience with confidence.

Step-by-Step Mobile Optimization Guide

  1. Choose a Responsive Theme

Choose a Responsive Theme

Responsive design lies at the core of mobile optimization. Opt for a WordPress theme that is explicitly labeled as “responsive.”

Such themes are built to adapt automatically to various screen sizes and orientations, ensuring your website’s layout remains coherent and user-friendly across all devices.

Responsive themes eliminate the need for creating separate mobile versions of your site, streamlining your design efforts and providing a consistent user experience.

When selecting a theme, preview it on different devices to ensure that all elements display correctly and intuitively. You can also develop your custom theme by hiring a professional WordPress theme development company.

Top 10 Responsive WordPress Theme

  • Divi
    Divi is a versatile and highly customizable theme that comes with a built-in drag-and-drop builder, making it easy to create unique layouts without coding skills.
  • Astra
    Astra is known for its speed and flexibility. It’s lightweight and offers many customization options to create a visually appealing and responsive site.
  • OceanWP
    OceanWP is a multipurpose theme with a focus on performance and SEO optimization. It provides a range of pre-built templates suitable for various niches.
  • Neve
    Neve is another lightweight theme that’s great for performance. It offers a simple design and compatibility with popular page builders.
  • Hestia
    Hestia is a modern one-page theme that’s perfect for startups and small businesses. It’s compatible with WooCommerce, making it suitable for e-commerce as well.
  • GeneratePress
    GeneratePress is a fast and lightweight theme with a minimalistic design. It’s highly customizable and works well with various page builders.
  • Enfold
    Enfold is a multipurpose theme with a strong focus on design and versatility. It comes with a variety of pre-designed layouts to choose from.
  • Avada
    Avada is one of the best-selling themes on ThemeForest. It offers a wide range of customization options and pre-built templates for different industries.
  • Soledad
    Soledad is a popular choice for blogs and magazines. It offers numerous layout options and styles to create visually appealing content.
  • Salient
    Salient is a visually striking theme with a focus on creative designs. It’s suitable for portfolios, agencies, and other creative websites.
  1. Optimized Images

Optimized Images

Images are essential for visual appeal, but they can significantly impact loading times on mobile devices if not optimized.

Compress and resize images before uploading them to your site to minimize their file size while maintaining visual quality.

Plugins like WP Smush and EWWW Image Optimizer can assist in automating this process.

Alternatively, consider using the “lazy loading” technique, which loads images only when they come into the user’s view, further enhancing performance.

Top 10 Tips to Optimize Images

  • Choose the Right Format:
    Select the appropriate image format based on the type of image. Use JPEG for photographs and images with many colors, PNG for images with transparency or simple graphics, and WebP for modern browsers that support it.
  • Resize Images:
    Resize images to the dimensions they will be displayed on your website. Avoid uploading large images and relying on HTML or CSS to scale them down, as this can slow down loading times.
  • Compress Images:
    Use image compression tools or plugins to reduce the file size while maintaining acceptable quality. Compressed images load faster without sacrificing visual appeal.
  • Optimize for Web:
    When exporting or saving images in image editing software, choose the “Save for Web” option. This ensures unnecessary metadata is stripped and the image is optimized for online use.
  • Use Image Compression Tools:
    Utilize online image compression tools like TinyPNG, ImageOptim, or io to further reduce image file sizes without compromising quality.
  • Lazy Loading:
    Implement lazy loading for images, which loads images as users scroll down the page. This technique prioritizes above-the-fold content, improving initial loading times.
  • Responsive Images:
    Use the srcset attribute to provide different image sizes for different screen resolutions. This ensures that users on various devices receive appropriately sized images, reducing unnecessary data transfer.
  • Use CDN:
    Consider using a Content Delivery Network (CDN) to serve images from servers closer to the user’s location. CDNs improve loading times by reducing latency.
  • Optimize Alt Text:
    Include descriptive and relevant alt text for images. Alt text not only improves accessibility but also helps search engines understand the content of the image.
  • Minimize Decorative Images:
    Reduce the use of decorative images that don’t provide meaningful content. Use CSS for simple design elements, reducing the need for additional image requests.
  1. Streamline Content

Streamline Content

Content plays a vital role in mobile optimization. However, the constraints of smaller screens require strategic content presentation.

Condense lengthy paragraphs, prioritize essential information, and break down content into easily digestible sections.

Utilize subheadings, bullet points, and shorter paragraphs to enhance readability.

Keep in mind that mobile users often have limited time and attention, so ensure your content is scannable and engaging.

Top 10 Tips to Optimize Content For Mobile User

  • Keep it Concise:
    Mobile users have limited attention spans. Write succinctly, conveying your message in fewer words while maintaining clarity and impact.
  • Use Short Paragraphs:
    Break content into short paragraphs to enhance readability. Long blocks of text can be daunting on mobile screens.
  • Use Subheadings:
    Utilize descriptive subheadings to guide users through your content. Subheadings break up the text and make it easier for users to find relevant information.
  • Prioritize Important Information:
    Place the most critical information at the beginning of your content. Mobile users often skim, so ensure that key points are easily accessible.
  • Use Bullet Points and Lists:
    Organize information using bullet points and lists. This format simplifies complex content and makes it easier to digest on mobile devices.
  • Avoid Jargon:
    Write in plain language, avoiding technical jargon that might confuse mobile users. Keep your tone conversational and relatable.
  • Optimize Font Size:
    Choose a font size that is legible on smaller screens. Aim for a font size of around 16px for body text to ensure easy reading.
  • Contrast for Readability:
    Ensure sufficient contrast between text and background to enhance readability, especially in various lighting conditions.
  • Minimize Hyperlinks:
    Reduce the number of hyperlinks in your content. Mobile users might find it challenging to accurately tap on small links.
  • Use Responsive Design:
    Ensure that your website uses responsive design, which automatically adjusts the layout and font size to fit different screen sizes. This guarantees a consistent reading experience across devices.
  1. Implement Mobile-Friendly Fonts

Implement Mobile-Friendly Fonts

Font selection contributes to both aesthetics and readability. Opt for legible fonts that render well on various screen sizes.

Avoid using fonts that are too small, as they can strain users’ eyes and deter them from engaging with your content.

Consider fonts specifically designed for digital interfaces, as they are optimized for both readability and mobile screens.

Test different fonts to find the right balance between style and usability.

Top 10 Tips To Implement Mobile Friendly Fonts

  • Choose Legible Fonts:
    Opt for fonts that are easy to read on smaller screens. Prioritize clarity over elaborate or intricate fonts that may become unclear on mobile devices.
  • Responsive Design:
    Use responsive design techniques to ensure that fonts adjust appropriately to different screen sizes and orientations.
  • Font Size Matters:
    Select an appropriate font size for mobile screens. Aim for a font size of around 16px for body text to maintain readability.
  • Contrast for Readability:
    Ensure there is sufficient contrast between the font colour and the background to enhance legibility, especially in varying lighting conditions.
  • Limit Font Variations:
    Avoid using too many different fonts. Stick to a cohesive font palette that compliments your website’s design.
  • Use Web-Safe Fonts:
    Opt for web-safe fonts that are universally available across devices and browsers. This ensures consistent display regardless of the user’s device.
  • Consider Loading Speed:
    Choose fonts that won’t significantly impact your website’s loading speed. Heavy or complex fonts can slow down mobile browsing.
  • Avoid Tiny Fonts:
    Steer clear of overly small font sizes, as they can strain mobile users’ eyes and discourage reading. Aim for fonts that are comfortably readable.
  • Test on Various Devices:
    Ensure your selected fonts display correctly and legibly on a range of mobile devices and screen sizes to guarantee a consistent user experience.
  • Accessibility Considerations: Keep accessibility in mind. Use fonts that are compatible with screen readers and ensure sufficient contrast for users with visual impairments.
  1. Optimize Pop-Ups

Optimize Pop-Ups

While pop-ups can be effective for capturing user information, intrusive ones can disrupt the mobile user experience.

Ensure that pop-ups do not cover the main content or make it difficult to close them on small screens.

Consider using alternatives such as banners, slide-ins, or timed pop-ups that offer value without hindering the browsing experience.

User experience should always take precedence over aggressive marketing tactics.

Top 10 Tips To Optimize Pop-Ups for Mobile Devices

  • Mobile Responsiveness:
    Ensure that your pop-ups are designed to be responsive, adapting seamlessly to different screen sizes and orientations.
  • Size and Placement:
    Keep pop-up sizes manageable and avoid full-screen pop-ups. Place them strategically so they don’t cover important content or navigation elements.
  • Clear Call to Action (CTA):
    Craft concise and compelling CTAs that clearly communicate the value of the offer or action users should take.
  • Minimalistic Design:
    Opt for simple and clean designs that load quickly on mobile devices. Avoid excessive visuals that could slow down loading times.
  • Easy Close Option:
    Make it effortless for users to close the pop-up. Include a prominent close button that’s easy to tap, enhancing user satisfaction.
  • Delayed Display:
    Implement delayed pop-up triggers to allow users a moment to engage with your content before encountering the pop-up.
  • Exit-Intent Technology:
    Use exit-intent pop-ups that appear when a user is about to leave the page. This provides one last opportunity to engage without disrupting the user’s experience.
  • Frequency Control:
    Limit the frequency of pop-ups to avoid overwhelming users with repetitive messages. Consider showing them only once per session.
  • Testing and Analytics:
    Regularly test your pop-ups on different mobile devices and browsers. Monitor analytics to assess user interaction and optimize performance.
  • Offer Value:
    Ensure your pop-up offers provide genuine value to users. Offering discounts, exclusive content, or useful resources can encourage positive engagement.
  1. Simplify Navigation

Simplify Navigation

Navigation is a cornerstone of user experience, especially on mobile devices. Create a mobile menu that is intuitive, easily accessible, and efficiently organized.

One common approach is to implement a hamburger menu, which condenses navigation options into a collapsible icon, saving valuable screen real estate.

Keep the menu concise by prioritizing essential pages and simplifying navigation paths.

Also, ensure that users can easily return to the homepage from any point within your site.

Top 10 Tips to Optimize Navigation for Mobile Devices

  • Streamline Menu Items:
    Condense your navigation menu to the most essential items. Aim for a concise menu that fits well on smaller screens.
  • Use Hamburger Menu:
    Implement a hamburger icon (three horizontal lines) to house menu items. This icon conserves space and offers a familiar mobile navigation pattern.
  • Prioritize Content: Place the most important menu items at the top of the navigation. Users shouldn’t have to scroll extensively to access critical sections.
  • Avoid Dropdown Menus: Minimize or eliminate dropdown menus as they can be challenging to interact with on mobile devices. Opt for straightforward navigation.
  • Clear Labels: Use concise and descriptive labels for menu items. Users should immediately understand the purpose of each link.
  • Thumb-Friendly Design: Arrange menu items in a way that makes them easily tappable with the thumb. Avoid placing links too close together.
  • Search Bar Visibility: Ensure the search bar is easily accessible for users seeking specific content. Consider a prominent search icon that expands when clicked.
  • Use Icons Sparingly: Implement icons alongside text labels for visual cues. However, avoid overwhelming users with too many icons, which can lead to confusion.
  • Sticky Navigation: Consider a sticky navigation bar that stays fixed at the top of the screen as users scroll. This keeps essential links readily available.
  • Testing and Optimization: Regularly test your mobile navigation across various devices to ensure it’s intuitive and responsive. Analyze user behavior to identify areas for improvement.
  1. Ensure Touch-Friendly Buttons

Ensure Touch-Friendly Buttons

Mobile devices rely on touch interactions, making it crucial to design buttons that are touch-friendly.

Buttons should be adequately sized to accommodate tapping without accidental clicks on nearby elements.

Additionally, ensure there is sufficient spacing between buttons to prevent user frustration.

Using contrasting colors and incorporating visual feedback, such as button highlighting upon touch, enhances the overall user experience.

Test the responsiveness of buttons on various devices to ensure consistent functionality.

Top 10 Tips to Optimize Buttons for Mobile Devices

  • Size and Tapability:
    Ensure buttons are of an adequate size for easy tapping. Aim for a minimum touch target size of around 44×44 pixels to accommodate different finger sizes.
  • Ample Spacing:
    Place buttons with enough space around them to prevent accidental clicks on neighboring elements. This reduces user frustration.
  • Clear Labeling:
    Use concise and descriptive labels on buttons. Users should immediately understand the purpose of the button without ambiguity.
  • Contrast and Visibility:
    Choose button colors that provide good contrast against the background. This ensures visibility and readability, especially in varying lighting conditions.
  • Finger-Friendly Shape:
    Opt for rounded or slightly curved button corners. Sharp corners can be difficult to tap accurately on mobile screens.
  • Consistent Styling:
    Maintain consistent button styling throughout your website. Consistency aids recognition and builds user familiarity.
  • Easy-to-Find Placement:
    Place buttons in easily accessible locations, typically within the user’s natural thumb reach, to enhance ease of interaction.
  • Hierarchy and Priority:
    Differentiate buttons based on their importance. Make primary actions more prominent and easily distinguishable from secondary ones.
  • Loading Speed:
    Ensure button graphics or icons are lightweight to minimize loading times. Slow-loading buttons can negatively impact user experience.
  • Testing and Feedback:
    Regularly test buttons on different devices and screen sizes. Seek user feedback to identify any challenges they might face while interacting with buttons.
  1. Test, Test, Test

Thorough testing is pivotal in mobile optimization.

Regularly evaluate your website on a range of devices, including smartphones and tablets of different screen sizes and orientations.

Testing helps you identify potential issues such as broken elements, misaligned content, or slow loading times that might be detrimental to user experience.

Emulate real-world scenarios by simulating various user interactions and scenarios, including scrolling, tapping, and navigating through your site.

By continually testing and refining, you can provide a seamless experience across diverse devices.

  1. Leverage Accelerated Mobile Pages (AMP)

Leverage Accelerated Mobile Pages

Accelerated Mobile Pages (AMP) is an open-source initiative aimed at creating faster-loading web pages for mobile users.

By implementing AMP, you create stripped-down versions of your pages that load almost instantaneously on mobile devices.

Are you looking for a WordPress developer

Contact Us

AMP significantly improves mobile loading speed, enhances user engagement, and positively impacts search engine rankings.

Many WordPress plugins are available to facilitate the implementation of AMP on your website.

  1. Monitor Performance

Mobile optimization is an ongoing process that requires vigilance. Utilize tools like Google PageSpeed Insights and GTmetrix to assess your site’s performance regularly. These tools provide insights into loading times, performance metrics, and suggestions for improvement.

Analyze your site’s mobile performance data, identifying bottlenecks and areas that need optimization. By addressing these issues promptly, you ensure that your site remains fast, user-friendly, and aligned with modern mobile standards.

FAQs

  1. FAQ: Why is mobile optimization important for my WordPress website?

Answer: Mobile optimization ensures your website provides a seamless and user-friendly experience on smartphones and tablets, improving user engagement and search engine rankings.

  1. FAQ: What is the impact of page load speed on mobile optimization?

Answer: Page load speed greatly affects mobile user experience. Optimize images, use caching plugins, minimize code, and reduce server response time to enhance loading times.

  1. FAQ: Are there plugins specifically for mobile optimization?

Answer: Yes, there are plugins like WPtouch and Jetpack that offer mobile optimization features such as responsive design, mobile themes, and performance enhancements.

  1. FAQ: Should I use a separate mobile site or responsive design?

Answer: Responsive design is recommended as it maintains a consistent experience across all devices, eliminating the need for managing multiple sites.

  1. FAQ: How can I test my WordPress site’s mobile optimization?

Answer: Use tools like Google’s Mobile-Friendly Test and PageSpeed Insights to evaluate your site’s mobile performance. Additionally, test your site on actual devices to ensure a smooth experience.

Final Thoughts

Mobile optimization is more than a trend – it’s a necessity for any website aiming to provide a satisfying user experience.

By following these step-by-step guidelines, you’ll be well-equipped to not only meet the expectations of your mobile audience but also boost your site’s visibility, engagement, and overall success.

As mobile technology continues to evolve, your commitment to mobile optimization will be instrumental in keeping your WordPress site ahead of the curve and accessible to users no matter where they are or what device they’re using.

How To Customize WordPress Website Theme

It’s always great to have a website for your business and if that is with WordPress, then you are one step ahead of your competitors. Because the CMS WordPress offers easy customization options with outstanding features and plugins to make your website user-friendly and search engine friendly.

After successful installation of WordPress theme, if you find it’s not the right fit for your business and needs customization for an engaging website. I’m sure it’s not annoying, as there are several options available for you to customize your WordPress themes.

Never miss an update from us. Join 10,000+ marketers and leaders.

Here are some facts and figures of WordPress below,

  1. WordPress commands 39.6% of the internet in 2021, it was 35% in 2020. Thus the growth of nearly 5%, which is also 1% better than the previous year.
  1. If you count only CMS-build sites, 64.1% of them are powered by WordPress – a 4% increase from 2020 (60%)
  1. Over 60 million websites are hosted on the Custom WordPress Development Services platform.
  1. The website base of WordPress increased by nearly 3.2% between 2019 and 2021.
  1. Some of the popular WordPress plugins such as WooCommerce get as many as a million installations per week.
  1. Over 14% of the top 100 websites on the internet are powered by WordPress.
  1. As of 2021, WordPress.org has more than 54,000 plugins and over 7,000 themes.
  1. Over 13% of all WordPress websites use the WooCommerce plugin. The plugin has been downloaded over 60 million times and installed by 3 million websites worldwide.
  1. WordPress is preferred and recommended by over 50% of CMS users and web designers.

(Source – blog.sagipl.com)

But the major challenge is finding the most right way.

So here are several options that you need to follow for the customization of your WordPress theme. This article definitely helps you to identify the right one for you.

Options To Customize Your WordPress Theme:

Before diving in and start making changes to your theme, you need to know the best options that are available for customizing of your WordPress themes.

Here you go,

  • If you want to add functionality to your WordPress theme, install WordPress Plugin.
  • Use the customizer to your WordPress admin screens for customizer fonts, colors, and layouts, depending on the theme you choose.
  • If you work on a page builder theme, use its feature for customizing the design of your WordPress website.
  • When you install a framework theme, you can use a child theme that is available to customize your site.
  • As your theme is specific to your site and you are comfortable with it. You can edit the theme’s code directly.
  • As you want to edit the code of the third-party theme, you can go with the child theme.

If you want you can edit the code, there are a number of options available to you. You can go with the block editor, to the customizer, all you need to do is some editing.

Why Do You Need To Customize Your WordPress Theme?

With a customized WordPress theme you can change the website appearance completely. It is a great form of promoting your own unique style. It will help you to stand away from the crowd.

Most of the top brands make sure to have distinct designs of their website. Their unique touch helps them emerge as a unique brand. With WordPress themes, you are not only adding design and features to your websites but it is also a way of promoting your business.

Also, sometimes you come across many themes that have poor design layout, poor build, bad color combination, and are not well optimized. All these factors may impact website’s performance.

No single theme available which can be 100% perfect to fulfill all the requirements. However, customization helps here.

How To Customize WordPress Themes?

There are many ways, you can customize your WordPress theme but the only effective method is the one on which you are comfortable with. Some of the common methods are:

  • Default WordPress Customizer
  • Customization with codes
  • Customizing WordPress theme with a page builder tool

By default, WordPress provides an inbuilt WordPress customization feature that helps the website admins to customize some part of the website easily. But if you have WordPress developer who is good enough with coding, then you can do endless modification according to your need.

Premium WordPress themes are also allowing to do customization.

But before you move into customizing your WordPress themes and start using codes. It is better to develop a child theme first and do changes whatever you want rather than creating any kind of mess by editing the parent theme file.

Create A Child Theme And Make Your Changes To It:

It is the best solution to avoid any kind of data loss to your WordPress theme customization or update to develop a child theme. It is one of the best ways to have custom codes or snippets and avoid them from being erased.

The child theme has all the same functions and features as that of a parent theme. But the WordPress theme will read the archive.php file from the child theme and not from the parent theme.

Also if you don’t want to mess with any theme files and codes, you can start the customization of your WordPress theme by using the default customizer.

How To Customize Your WordPress Theme With A Default Customizer?

Instead of getting into the coding and all, you can use the theme customization tools. All you need to do is, first visit your WordPress Theme repository and select a theme that you will use for installation and customization.

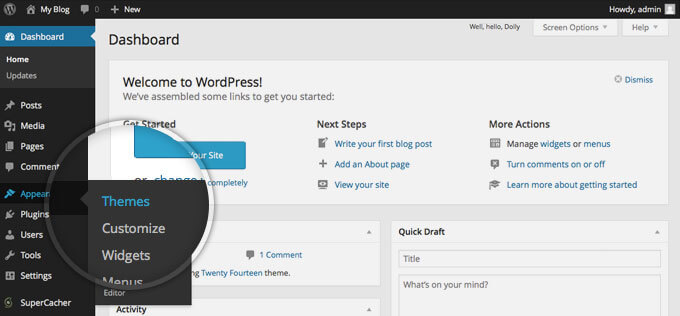
Then go back to the WordPress dashboard, go to the Appearance menu section to get more options on the left side of your dashboard menu.

Theme Customization(Source: Stack Overflow)

Taskbar, Appearance > Themes> Select Theme> Install > Customize

Some common features that you can customize in the WordPress theme by using WordPress customizers are:

Add Identity To Your WordPress Website:

Adding an icon, title, and logo to your WordPress website will help in promoting and developing a brand with a tagline that will highlight the motto of your brand.

Customize Your WordPress Theme Color:

There are some WordPress premium themes available that don’t allow the users to customize the theme. They may ask extra money for the customization. It completely depends on the theme you are choosing.

If your theme allows you can easily get colors and dark mode options available in the WordPress customizer panel.

Lots of customization you can do with your personal and business website. Some themes allow you to add widgets while some other allows homepage settings. With WordPress any type of customization you can do based on your requirements.

FAQ:

How To Create A Custom WordPress Theme?

To create a custom WordPress theme

  • Go to WordPress Admin Panel
  • Then go to pages
  • Click on Add New.

You can see the new custom page template that is listed on the right side. There you can create a new page and set the template in the page with outside bar. Once you are done, publish it.

How Can You Change Your WordPress Theme Without Losing Your Content?

To change your WordPress theme without losing your content by following the simple steps:

  • You need to set a staging copy of your website
  • Install the new theme and preview it.
  • You can activate the new theme
  • Solve the issue and replace the missing elements
  • Push the staging website into live.

Can You Customize Your WordPress Theme?

Yes, WordPress themes can be customized in many ways. It depends on the extent to which you want to change your theme look and feel.

I’ve worked with the team at Andolasoft on multiple websites. They are professional, responsive, & easy to work with. I’ve had great experiences & would recommend their services to anyone.

Ruthie Miller, Sr. Mktg. Specialist

Salesforce, Houston, Texas

LEARN MORE

You can develop powerful theme customization settings that are built right into the WordPress customizer, to add WordPress plugins and have real-time CSS Editors such as Site Origin CSS

Conclusion:

One of the best parts of building a website with WordPress is you can take control over the way you are developing it and this will let you know how much customization is required.

A theme is an important part of your website. Also, many users stick with the same WordPress theme for a very long period. Minimal things like breadcrumbs and schema markup can do a lot more to your WordPress Website’s Dedicated wordpress app developer and rankings.

There are lots of things to customize in your WordPress website.

You can customize your WordPress on your own, but if you feel difficulty in doing so, we are here to help you. With Andolasoft dedicate WordPress developers, you can customize as per your business requirement.

Are you looking to customize your WordPress theme or want more information on WordPress website customization! Book a free consultation with Andolasoft experts.

How To Develop Your WordPress Website In 2021?

The Covid-19 Pandemic has led many businesses to switch to digitalization, including websites. With a business website, you can reach more people and keep your business running in the event of any future pandemics.

Few years back it was nice to have stuff but it has become a must have feature for every business.

So, here is the suggestion for every business to build a website to pitch your business on the World Wide Web and just won’t fall behind in the competition.

Why Choose WordPress?

Everyone knows it is open source, easy to customize and simple to maintain. We have published the top reasons for using the WordPress framework previously.

It provides you complete control over your website. WordPress web application provides great advantages like plugins, free tools, and themes with full media support.

However, to make a website live, you need to go through a process.

Developing a website can be daunting, especially when you’re not a programmer. But, this is not a concerning point anymore.

As you can build a website using the WordPress CMS framework by following a few simple steps.

Let’s start;

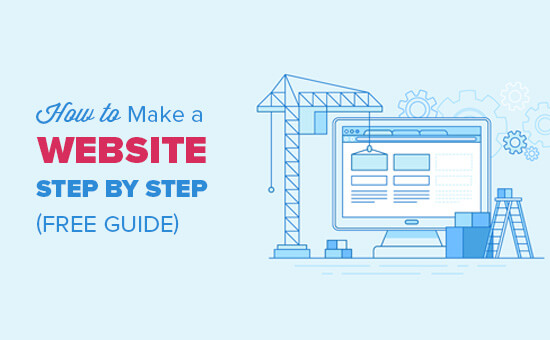
Make Website Guide(Source: WpBeginner)

What are the necessary things to do to develop your website in WordPress?

Here is a list that needs to be included.

  1. Purchase a domain: The price starts from $15 per year
  2. Hosting acquisition: The price begins at a low price of $8 per year
  3. WordPress Theme: It depends on the level of customization and the features you want to include in your website. You can choose a theme that comes free forever. On another note, some enterprises choose some highly engaging themes to build their website. It costs based on the theme and its features.
  4. WordPress Plugin: Most of the plug-ins are free, but if you want to have advanced options. You need to upgrade to a particular plan.

It signifies that a simple website starts on the basic annual plan. If you want any advanced features the price increases accordingly.

Website Construction(Source: Organic themes)

Choose the Domain Name:

The domain name may be the name of your business or product. Names are a powerful element of your business.

You need to choose the name of your website wisely. If you are finding it difficult to choose the name, you can use tools it helps you out.

Tricks and Tips to choose a website name: As you want to give a name to your new website. The name should hold meaning and importance.

The name needs to be unique and easy to remember. It shouldn’t give any weird meaning in English or other popular languages, if you want your business to go international.

List of Relevant Keywords:

You need to list relevant keywords for the product or business. You need to think about the users, how they will feel after they use the services or product.

You can use a tool like Namelix or Novanym, this helps to generate domain name ideas.

Understand the meaning:

As you found your domain name, check out the meaning. Google it and then go for the Google images and understand how it matched.

You might find a singer or some artist related to that name. This will provide you with a brief understanding of the domain name you choose.

  • You can also search for the domain name on Facebook or LinkedIn. Check if there are any business names with it.
  • Check if any website domain name is available for sale. Many websites prefer “.com”. It is a top-level domain, followed by “.org”, “.net”, or “.in”.
  • Purchase your domain name. You can purchase it through a domain registrar like GoDaddy or a hosting provider.

Choose a Web Hosting

Every website is hosted from a server. It states that you need to acquire web hosting from a hosting provider.

As you start creating a WordPress website, you need to choose a hosting plan using WordPress.com. You can also choose from a third-party hosting provider.

But before you proceed, you need to know that there is WordPress.com, which helps you to host and build a website.

The other one is WordPress.org, which helps to acquire plug-ins and themes for your website. You can choose you’re hosting from a third –party.

There are three major hosting services: VPS, managed to host, and shared hosting. In the first situation, the server resources were split with more sites. When the sites grow, you might come across performance issues.

Also, you might realize the need for a VPS service or a managed hosting plan.

You need to understand the business goals while choosing the hosting provider. As you go with VPS hosting, the resources need to be shared, but you will gain some control over it.

Also, you can observe improvement in security and performance.

With a website, things can become more complicated, but proper planning will help you with a successful website for your business.

While you analyse your plan take a look at them:

  • Storage
  • Pricing
  • Performance
  • Support

Also, many hosting providers have extra features provided like domain offering (ex: Namecheap), website builder (ex: Go Daddy), e-commerce options, etc.

Also, you have observed many websites using “HTTP” or “HTTPS”. So what are those?

HTTP is a modern web. This connects the browser and servers. It functions on a request-response basis

However, the extra “s” on the “HTTPS” means the connection with the website is encrypted and the data that is shared in the website remains secure.

In technical terms, we called it SSL certification.

Suppose a user makes any kind of transaction on your website or gets logged in to your account. The information provided by the user will remain private; it is safe from getting hacked.

It takes place through SSL technology. The SSL stands for “Secure Sockets Layer”. Consumers see “HTTPS” as a signal of trust. It helps to protect privacy and data. This means you need to acquire an SSL certificate.

Also, make sure the connection plan has this as well:

This time you get a hosting plan and set up the login details. The only thing missing is WordPress itself.

Many hosting providers allow you to install WordPress through the wizard/dashboard. It’s pretty intuitive.

Logging into the website is also easy. You need to type the website address and add it on the “/WP-admin”.

Choose your WordPress Theme:

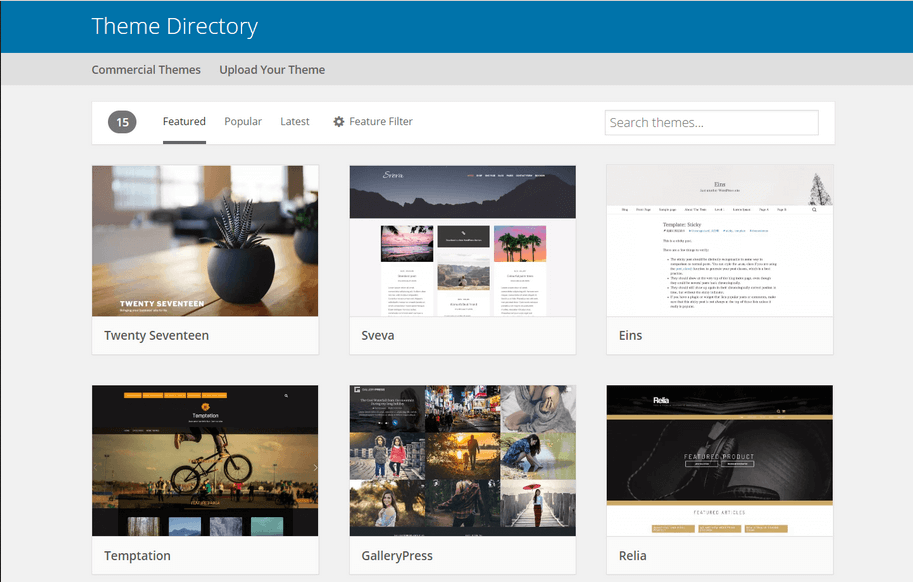
Next, you have to decide the theme for your WordPress website. There are many themes available. These themes are available for free and some are paid.

As you select your theme, try to ensure that the theme creates sense with the topic of your website. Also, it engages with the layout and the content you publish.

Theme Directory(Source: WP Engine)

The WordPress premium choices provide a set of ready-made options for several topics. It includes services, business, fashion, beauty, photography, education, food, and others.

Each of them will provide an excellent base to your site that you have always dreamed of.

Configure the Plugins:

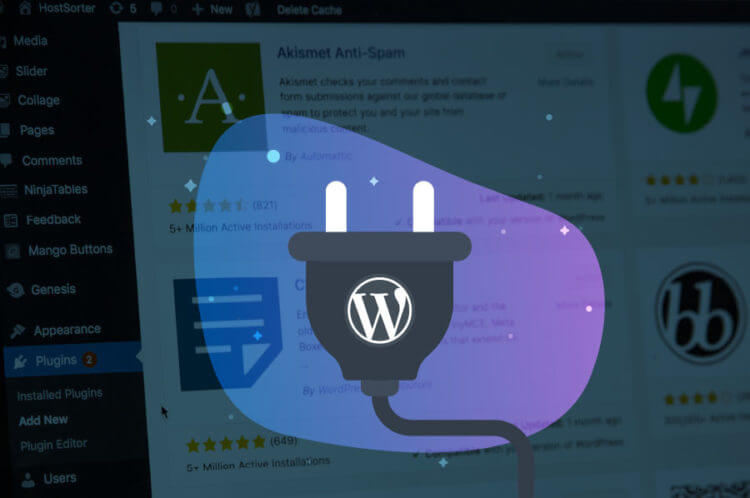
A WordPress Plug-in is defined as a program written in the PHP script language. It adds a specific set of features or services to the WordPress website.

Wordpress Plugin(Source: Dreamhost)

A WordPress plug-in offers a great deal of flexibility and customization to your WordPress site. It adds value and features to your visitors.

At first, you don’t begin with a ton of plug-ins. But as you grow with WordPress applications, you get to use more Plug-in that benefits the site.

Some of the popular Plug-in are Yoast SEO and JetPack.

Complete the Administrative Page:

The important page in your website is the about page, contact page, privacy, and the disclaimer page. You need to focus on it, before adding content to your site.

It is easy to add now and then later. Once you have done the publishing, you can add other exciting stuff. These pages also serve to protect your site visitors and you.

Post Your Content, Rinse and Repeat:

Once you get the important administrative pages published, it’s time to start adding interesting content. Whatever the niche is, you need to make sure it has plenty of quality content for the readers.

It increases the page’s visibility. This gives a rich look to your page. Keep it a priority to add new content daily, monthly, or weekly. Keep a content calendar that helps you to remain on the right track.

Never forget marketing:

Marketing your website is an important step. It helps to get more traffic. There is an availability of SEO optimization but make sure the page has relevant keywords in the description, title, and body.

Promote your sites in every possible way. Also, there are many free options available to use the Social Media sites, emailing a regular newsletter and forums.

You also need to consider guest posting, comment on the blogs, communities, and forums to develop social connection and link popularity.

WordPress Development(Source: PC Mag)

Backup your site:

As content is an important asset, it is important to have a backup of your site. You need to have a backup of your content in case of a crash. So, you don’t have to begin from scratch.

If you don’t back up all the posts, affiliate links, and plug-ins, it will take a while to get back on your feet. So you need to have a regular backup, the web host should offer an alternative.

FAQ:

Is WordPress Free For Websites?

WordPress.org is completely free. You can download and use it in any way you like. It can also be customized, redistributed or extended. You can even sell it until you have the GPL License.

How to create a website on WordPress?

You can create your Website on WordPress by following these steps:

  • Signup to WordPress.com
  • Confirm your Email and activate your Blog
  • Setup the blog
  • Select and customize your WordPress theme
  • Connect with Twitter and Facebook
  • End the process
  • Visit your new website

Does WordPress require Coding?

No, you don’t need to have HTML knowledge or other programming languages for a website.

Many WordPress users don’t have any programming or coding skills and they have been using WordPress for many years.

Can I develop a WordPress Website without hosting?

Yes, you can develop a website with WordPress without hosting. The basic version of WordPress is free and it allows you to create a website without any hosting.

You can also develop a WordPress Website without a domain name.

Conclusion:

So, here is a small view of the ways to prepare your website using WordPress.

A website is a key to your business growth. It follows several steps such as choosing the domain name, Plug-in, WordPress theme, and several other features.

Also, after developing the website, you need to update and maintain it with regular updates.

In case of any difficulty in developing your site, Andolasoft WordPress developers are happy to help you. Contact to Andolasoft.com and develop your successful business website.

If you are enjoying our blog, subscribe to Andolasoft blog to get the latest updates.

How To Robust eCommerce Store Using WordPress

Ecommerce is poised to become a major player in the global retail market, and the global eCommerce industry may make up as much as 6.7% of all retail sales by 2025.

And it’s not just giants like Amazon or Walmart that contribute to this figure, as the local marketplace features a multitude of stores selling everything online.

One of the best parts about entering the eCommerce world is that it’s easier than ever to do so. There’s a huge array of services that can give you everything you need to set up your online store with only a few clicks. Find a suitable eCommerce platform, you’re off to a good start!

Never miss an update from us. Join 10,000+ marketers and leaders.

In our previous article about what you should consider before building an eCommerce store, we covered several of the best eCommerce platforms to choose from. This time, we zero in on building an online store with WordPress, one of the most popular and flexible solutions for eCommerce.

Why Use WordPress?

WordPress is a free-and-open-source content management system that is developed by both a core group of lead developers and a community composed entirely of volunteers.

About one-quarter of all the websites on the Internet have WordPress as their content management system, and for good reason—it combines ease of use that allows it to be applied to even the most basic websites and plugin-based modularity that allows its functionality to be extended to meet virtually any needs.

Its open-source, community-managed nature also ensures that WordPress is constantly up-to-date with security patches and new features. Tutorials and documentation to do just about anything can also be found all over the Web—if you have a question about WordPress, it’s almost certainly been answered already.

WordPress is particularly useful when building an eCommerce website because there are plenty of premade themes suited to an online storefront. It also features plugins that add complete eCommerce functionality to a site, from product display to shopping cart and checkout.

Finally, one of the top reasons to go with WordPress is that it’s a flexible platform that offers you complete control over what your website does and how it appears. On top of your storefront, you can also include a blog, a forum, and any other pages you need.

All this comes without any ongoing fees to make use of the WordPress platform. Your monthly fees come from your hosting company and domain registrar, with WordPress itself being free to use, and certain plugins and themes being one-time purchases.

Planning to create an online store with WordPress? This blog post will help you along every step of the process.

Step 1: Choose Your Domain Name And Hosting Provider.

The first step in WordPress eCommerce setup starts with your domain name. This will become the address of your future website. A domain name is what you enter into the address bar of your browser to access a website.

While WordPress itself is free, you’ll need to pay for your domain name, which starts at US$10 per year. The cost is well worth it, as having your own domain name (i.e. yourbusinessname.com) is far more professional-looking than having your name on someone else’s domain (i.e. yourbusinessname.otherdomain.com)

You will also need a hosting provider, a service that will host your website on the Internet. By having a dedicated hosting provider, you’re assured that your website will load quickly and not suffer from extended periods of downtime.

You have the option of a shared or dedicated host. With a shared host, your website is on the same server as several other websites, which is cheaper, but often provides you with less control over your website as well as potentially smaller storage and bandwidth availability. Meanwhile, a dedicated host is more expensive, but gives your website a whole server exclusively for your use, and gives you a wide degree of control, storage, and bandwidth.

After snagging your domain and host, you can now install WordPress, and there are two ways to go about it:

One-Click Install

In the one-click install, you register your domain name and get your WordPress site hosted from the same provider. WordPress recommends your host supports PHP 7, MySQL v5.6+ or MariaDB v10.0+, and HTTPS.

You can also use hosting providers trusted by WordPress, which will make installation easier and ensure that your chosen host is supported. WordPress itself recommends Pressable, BlueHost, Dreamhost, Flywheel, and Site Ground.

Manual install

With the manual option, you set up a server manually, then install the WordPress platform on your server, and configure it. You’ll need to have an FTP client, a database set up through cPanel or PHPMyAdmin, and access to your web server. As such, this option is recommended only for advanced users. WordPress has extensive documentation that can walk you through the process.

Step 2: Select An ECommerce Plugin.

What will separate your WordPress eCommerce website from a standard WordPress website will be the means by which you sell products directly from your site. There are no native WordPress eCommerce features, so to add this functionality to your website, you’ll need to install an eCommerce plugin.

WooCommerce

Once a mere eCommerce plugin, WooCommerce has now morphed into a whole platform with its own plugin system since it was acquired by Automattic two years ago. It’s a highly customizable platform that gives you total control over your online store. About 30% of all online stores use WooCommerce as their platform; some local stores that use it are Beauty Choice and Green Point Flowers.

WooCommerce features a complete eCommerce backend that helps you build and organize product pages, and provides a shopping cart and checkout process.

Easily manage and track customer discounts with the powerful WooCommerce plugin.

It’s free to use, but you can extend its functionality even further with various paid and free extensions. Extensions can do anything from serving AI-driven recommendations to customers on product landing pages to providing the option for scheduled group and daily deals that trigger when a predefined number of people purchase an item.

Easy Digital Downloads

While most eCommerce plugins and platforms revolve around the sale of physical products, Easy Digital Downloads or EDD is specifically designed to help you sell digital products.

EDD allows you to create discount codes, place restrictions on downloads, and provides full tracking and data reporting of downloads, sales, and other statistics. You can also add new features to your EDD storefront with extensions, which give you the ability to sell software licenses and subscriptions, add payment processors like PayPal, and more.

EDD is free, with various paid extensions you can purchase.

WP eCommerce

WP eCommerce isn’t quite as fully-featured as WooCommerce, but it’s another popular and robust choice for creating an online store with WordPress.

It has all the basic features, including product pages, shopping cart, and checkout functionality, and comes with excellent data reporting capabilities and inventory management. Like the other plugins, it’s free but provides optional paid and free extensions that can add functionality. It also comes in a paid Gold Cart package option that adds more advanced tools, layouts, and features. You can also purchase premium payment gateways like Stripe and Authorize.net.

Step 3: Install Your eCommerce Plugin.

Once you’ve chosen an eCommerce plugin for your WordPress site, it’s time to install it through your WordPress backend. For convenience’s sake, the following steps assume that you chose the WooCommerce platform:

Log in to your WordPress dashboard.

On the sidebar, go to the Plugins section and click “Add New”.

In the search bar, type “WooCommerce” and hit Enter. Click “Install Now” on WooCommerce by WooThemes.

If you’re still at the stage where you’re looking for a hosting provider, you may want to check out Bluehost’s partnership with WooCommerce. Bluehost offers an all-in-one solution for WordPress eCommerce setup, which includes a domain name, WordPress with WooCommerce pre-installed, and SSL certification to keep your online store secure.

Step 4: Set Up The Product Pages.

Now that you have your plugin set up, it’s time to start adding products and their product pages. Every plugin does things differently, so we’ll cover the steps for doing this in WooCommerce.

At the very least, every product you add must have the following features:

  • Product name
  • Price
  • Image
  • Brief description

Begin by entering your WordPress admin panel, then select “Products” on the sidebar and select “Add Product”. WooCommerce allows you to add both physical and virtual products to your store.

a) Adding Physical Products

You’ll be greeted with an interface very similar to that of publishing a blog post on WordPress. Insert your product name where a post title would normally be, and add a description where post content would be. Then, on the right sidebar, add a product image for your product (analogous to a featured image), and then optionally insert more images in the product gallery.

Next, in the Product Data section, add more details about your product. The first thing to pay attention to is the Product Type drop-down box. The applicable product types for physical products are the following:

Simple: A simple product with no SKU options

Grouped: Multiple related products, which consist of several related “child” products, each of which is a Simple product

Variable: A product with different SKUs, for example, shirts or shoes that have different size options

External/Affiliate: Items sold outside of your store

For now, let’s go with a Simple product.

You’ll also see “Virtual” and “Downloadable” check boxes next to the Product Type. Leave these unchecked for physical products.
Let’s move on to the components on the left of Product Data, and what goes on in each:

The Attributes section is where you can assign special details to each product. You can add as many attribute fields as you like. Just make sure to keep the attribute consistent among similar products being sold.

b) Adding Virtual Products

Virtual products are products that are not sold physically, while downloadable products are downloaded from your store. Some products are both virtual and downloadable, such as eBooks.

Adding virtual products features the same process as physical products for the most part. However, with virtual products, you’ll check the “Virtual” or “Downloadable” boxes next to Product Type. When you select either option, you lose the Shipping tab in Product Data. You should also go to the Inventory tab and uncheck “Manage stock?”

For downloadable products, the General tab gets more options:

Downloadable files: Insert file links here for large files or files you’ve previously uploaded. Alternatively, click the “Choose file” to upload a file.

Download limit: Maximum number of times this file can be downloaded

Download expiry: Buyers can only download the file for a certain number of days.

Other than these changes, the process remains the same for physical products.

After the Product Data part, you’ll find the Product Short Description. This will appear at the top of your product landing page.

Your shoppers will see this short description before the full description that you’ve already written.

Once this is done, click “Update” and the product will be added.

WordPress eCommerce Product Uploading Tips

The following tips ensure that your products are attractive to customers, and can be located easily either from your storefront or through a search engine.

a) Don’t Forget Your Titles!

Your product should always be named in the title bar when you add a product to your store. You should also use SEO tools such as Yoast to determine the best possible title for your product based on SEO.

b) Create Catchy Product Descriptions.

Don’t copy descriptions from the product’s manufacturer. Be unique and creative with your descriptions. Also, use very specific, long-tail keywords that will ensure your product appears in search engine results. Finally, be short—limit descriptions to 150-250 words.

c) Mind The Quality Of Your Images.

Use a square-shaped featured product image to conform to WooCommerce standards. Also, use large, high-quality images to attract more customers.

d) Categorize And Tag Accordingly.

Place your products under categories and tags. The effect is twofold: Customers will have an easier time browsing for them, and Google will also consider them similar to keywords.

Step 5: Payment

Just as it is the last step in the shopping process, both online and offline, the last step in any WordPress eCommerce setup relates to payment. Your eCommerce site needs a means of receiving payments from customers.

Most online retail financial transactions take place over payment gateways, which are services that act as a middleman between you and your customer.

Upon checkout from your site, a customer is directed to the payment gateway’s website, where they input financial information or sign in to their account with the gateway. Money is exchanged securely from the customer to the payment gateway, and then the payment gateway transfers the money into your merchant account. Some payment gateways also host payment accounts as well.

PayPal is one of the leading payment gateways available, but it’s not necessarily everyone’s preference. Thankfully, WooCommerce supports a wide variety of other gateways, and adding them is as easy as a trip to the Payment Gateways section of the WooCommerce Extensions store, from which you can add the gateway of your choice with a single click. Payment gateways come in both free and paid forms.

To make use of most features of payment gateways, you’ll need to have an SSL certificate. This ensures that all transactions, and thus exchanges of financial information, between you and your customer are safe from the prying eyes of hackers. Getting an SSL certificate can usually be achieved through your hosting provider for a fee.

In Singapore, certain payment gateways are favored by both customers and local eCommerce sites. Here are some of the top that is in use:

2Checkout

2Checkout allows eCommerce merchants to accept payments seamlessly from all over the world, whether from mobile or online. eCommerce sites have the option of using 2Checkout as a hosted solution, where buyers are directed to the 2Checkout website to complete payment. More advanced site owners can choose to integrate their storefront directly with the 2Checkout Payment API.

Asia Pay

One of the largest payment gateways in Asia, Asia Pay is also among the top choices for payment processors in Malaysia, Vietnam, and the Philippines.

Paypal Express

Fast and efficient, PayPal Express lets users check out and pay for their items in three clicks. Users can store their financial information easily within PayPal, making the process quick and easy.

Avoid hidden charges and choose the correct payment gateways for your store.

Considerations when choosing a payment gateway

1. Cost

Every payment gateway charges a certain percentage fee per transaction. Check out the service charges for each gateway you plan on using. Sometimes, a higher fee is justifiable if a gateway has excellent service.

2. eCommerce Compatibility

Not all payment gateways are supported by every eCommerce plugin. Ensure that your payment gateway of choice is included in the list of extensions of your eCommerce plugin.

3. Financial Information Input

Payment gateways will offer two options for receiving financial information from customers. One is the hosted page, which redirects customers to the payment gateway’s website after checkout, where they enter their information. This is the most secure method, but it’s also a little unwieldy and is not likely to match your store’s visual theme.

The other method is integration, where customers input their financial information in a series of fields directly on your website, which will then be sent to your payment gateway. This method is much more seamless and convenient but is less secure.

4. Mobile compatibility

More and more online transactions are taking place over mobile devices. It’s imperative that users be allowed to purchase and pay for items from your store even if they’re using their smartphones. Choose a payment gateway that not only supports transactions over mobile but also has an optimized mobile experience with a good UI.

5. Security And Support

Few things are as important as the safety of your customers’ information. To ensure this, make sure that your payment gateway features encryption, support for SSL certificates, and anything else to do with the protection of data.

I’ve worked with the team at Andolasoft on multiple websites. They are professional, responsive, & easy to work with. I’ve had great experiences & would recommend their services to anyone.

Ruthie Miller, Sr. Mktg. Specialist

Salesforce, Houston, Texas

LEARN MORE

You should also be able to respond to problems with payment, refunds, and other concerns about transactions. Your payment processor of choice should have efficient and timely support that responds to your needs effectively.

For more information about setting up a payment gateway with WooCommerce, check out this detailed guide.

Conclusion

This article is a WordPress eCommerce how-to guide that has walked you through every step of building your own online store on one of the biggest platforms on the Web. You’ve learned how to choose your hosting provider, decide what plugin to use, install your plugin of choice, add your very first product, and set up a payment gateway for your site.

Want to launch your own eCommerce Store? Let’s Discuss!

Know The Benefits Of Hire Remote WordPress Developers

COVID-19 Pandemic has changed the entire global market almost in the period of a week. And the business industries having no exception from this calamity.

Perhaps, the anti-dote might be under development but this global epidemic is going to make a long-lasting impact on the common society.

We can say the business to each individual is putting themselves in lockdown to skip this calamity. But certainly, we can not stop working. Every business and industry must go on.

If we would not, we can face global economic crises in the very recent future. There will be sectors, companies, and workers that will be severely harmed.

Never miss an update from us. Join 10,000+ marketers and leaders.

So, let’s not stop running our business rather change the way we work. So that we can achieve equivalent productivity.

As also most every Government of states has released the advisory to stay at home and maintain social distancing to stop the spread of this virus, the online business stakeholder may consider hiring the dedicated or remote team for outsourcing their business needs.

When it comes to the point of running or starting-up new business;

Building a business website online may be something in your mind for days even not for months.

Well, it will take some time before you start as you need to decide on the right development platform and package.

Maybe, you want to try one of the top 3 CMS platforms (WordPress, Joomla, and Drupal) and are already seeking answers from professional wordpress website development company companies.

Even if you have professionals to build your website, you still like to manage it yourself once it is launched. So, you need to make certain crucial decisions like which platform to choose and use for your website development.

The million-dollar question is why?

Why Businesses Choose WordPress CMS:

Well, WordPress is one of the most commonly used CMS platforms for developing websites. More than 24% of websites worldwide are built on WordPress.

Since 2003, this CMS has taken the world of blogging by storm. However, several transformations have made it more than just a blogging website to an open-source web development platform.

WordPress is used by millions of web users globally and is a perfect platform to promote products and services. The CMS is easy to use, full of unique features.

WordPress also offers plenty of plugins that can dramatically improve user experience. With the help of an experienced WordPress development company, you can build a website that will boost sales and visibility of your business.

It’s not just about digital presence and sales though. With a WordPress-based website in place, you can leverage many other benefits to improve business efficiency and stay ahead in the competition.

Also Read: 8 Incredible Benefits for Choosing WordPress Development for Your Website

Advantages Of Remote WordPress Development Team

If a fast time to market is one of your priorities, with outsourcing app development you can start your project very quickly. It especially works best in the conditions of nationwide strict quarantine, when remote work is obligatory for everyone.

In such case the best option is to set up a team of remote developers who work for a software company, not freelancers since it is quite risky, and taking risks is not a good time when your business is operating on the edge.

Cost Reduction

It is one of the main advantages of outsourcing over in house development. An offshore outsourcing company helps businesses reduce development costs, which in turn frees up resources that can be used for new development opportunities.

Outsourcing Saves Time

The market typically requires a fast turnaround for the process of mobile application development. When outsourcing such a project, you do not waste time and money on hiring, training, and retaining employees.

Best Engineering Talent

When you team up with employees from other countries, you are getting access to the best engineering talents from all over the world, as opposed to simply hiring people that are available within a radius of 30 km from the location of the company.

This factor becomes especially crucial when you have not just a company, but a startup: where every new employee is an important decision that will almost certainly affect the outcome of your business.

You hire an experienced WordPress Developers, well-coordinated, and dedicated team. Well-established outsourcing companies offer fully staffed and dedicated teams of developers where team members have known each other for a long time and worked together on many projects.

You can be sure that these employees are professionals and have a lot of experience to meet the requirements of your project and introduce the best solutions.

High Communication Standards:

You get a team that follows the highest communication standards to ensure full transparency throughout the process, just as if you were working with an in-house team. Needless to say, they adapt to your local hours.

Close Supervision:

Your personal manager will keep you in the loop with regular meetings, demo sessions, and constant communication. As a result, you will always know exactly what your team is working on as well as monitor the progress status of the tasks and their expected completion date.

I’ve worked with the team at Andolasoft on multiple websites. They are professional, responsive, & easy to work with. I’ve had great experiences & would recommend their services to anyone.

Ruthie Miller, Sr. Mktg. Specialist

Salesforce, Houston, Texas

LEARN MORE

End-to-end services and support. On-demand access to a pool of developers, DevOps, QA, designers & architects. You can easily and accordingly adjust your team size or skill set(s) to the project requirements throughout the evolution of your project.

Risk Reduction:

After signing a contract, all project risks are transferred to the outsourcing company. Typically, an outsourcing company guarantees delivery on time and on budget. Also, all your sensitive data regarding the project is protected due to signing a non-disclosure agreement, so that you can be sure there is no risk of a “project theft” or any confidential information leakage.

Also Read: What’s Going To Be WordPress Trends for the Year 2020?

Wrapping Things Up

Choosing WordPress to develop a website is a wise decision term for both performance and profitability.

If you want to build a website for your business, WordPress offers you a perfect platform for engaging target customers. By hiring a WordPress development company, you will get a quality website having all the features that will promote your business. You can also show the world that you offer them something unique to choose from. WordPress websites stand out in the digital space in terms of performance, appearance, and user-friendliness.

Looking for a remote WordPress Developer Team? Get in Touch!

Most Important Values Of Choosing WordPress Development Service & Team

It is usually supposed that in the field of dealing, one cannot participate if anything is presented for at no cost. However, there is one exemption call WordPress development.

If somebody would ask me to put my review on WordPress CMS or website, I would say the websites developed on WordPress are manifest with numerous functionalities, seamless usability, and search engine friendly.

The Business owners who aiming to launch an online presence always want an excellent web. The Most Important Values Of Choosing WordPress Development Service & Team site with notable designs these days.

However, WordPress has the perfect set up to make sure the contents of your store are structured logically, simple to achieve, and exhibit attractively.

Never miss an update from us. Join 10,000+ marketers and leaders.

By using the important standards in custom WordPress development services is the only sure-fire way to produce revenue from the wealth and efforts invested in website development.

Choosing A Custom WordPress Development Service:

There is inflexible competition in business and each brand name having a website as an efficient instrument to make their spot on the market.

A well designed, well structured, and attractive website is an important guard that can defend the business owners in this intensely aggressive era.

Also, a well-designed website can engage your users and influence them to return to your website. This will defiantly help a lot in defending your market share.

Wordpress Design

A quality WordPress service always creates a win-win situation as you can focus on your main business and also ensure continual growth in the value of your web properties.

These can be used as effective tools for generating leads and increasing revenue.

Once you kick off your website development task, you will recognize that there is additional compensation that you will be able to avail of throughout the WordPress Design package.

Bring Down The Risk Of Getting Hacked:

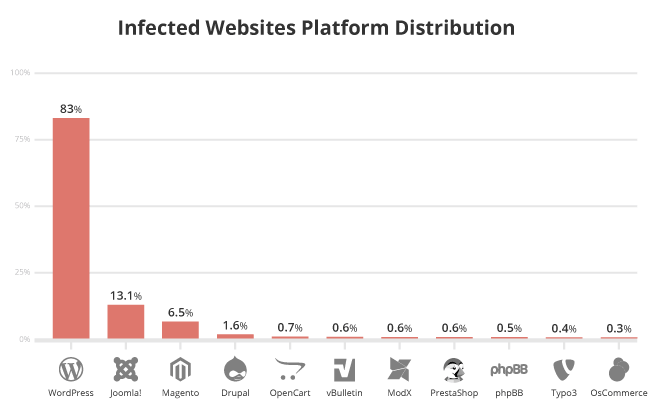
Wordpress Hacking Statistics by Sucuri.net Source: www.sucuri.net

The above statistics say more than 30K websites getting hacked last year and it is more than 80% in total.

But at the same time, the developer can bring the risk of hacking by installing the enterprise-level security and can save your website from getting deleted.

Also, the WordPress updates are automatic and free, and you can choose whether you want your plug-ins to update automatically or whether you will handle those updates manually by yourself.

Previously we already made a brief discussion to enhance the security of the WordPress website.

Choosing A Right Development Team And Productivity

When you choose a WordPress development team, it is always important to consider you that the ROI is achieved at the correct time.

Outsourcing is helpful tactics if it generates returns by itself. If you go for to hire developers then the output they would deliver will help you to generate adequate profits to help you cover costs.

ROI on WordPress DevelopmentImageSource: emuwiki.com

The world of the internet is packed with paid ads with assuring results.

Same time, the integrity of a developer is the most important point you need to judge at the time of finalizing the WordPress team to work with.

I’ve worked with the team at Andolasoft on multiple websites. They are professional, responsive, & easy to work with. I’ve had great experiences & would recommend their services to anyone.

Ruthie Miller, Sr. Mktg. Specialist

Salesforce, Houston, Texas

LEARN MORE

So, choosing the low hanging team might not make sure you the class of outcome. On the other hand, it is also not good to go for a costly team as they might lack liability.

You can have a look at my tips to follow before choosing or hire a dedicated developer.

Conclusion:

So, you need to find an experienced WordPress development company, who are ready to give their support through the project within your budget.

They must have the feeling of accountability towards your project and concept to yield your business.

Just go for a quick inquiry related to skills of developer’s portfolios, budget limit, deadlines, and assurance to your ROI prior to initial the choice process of the WordPress development team.

Are you looking for a WordPress development team? Let’s Discuss!