How Business Intelligence Can Help Direct Sale Organization

As of now, Big-data has already created a lot of buzz across all industries. An organization has to handle various types of data like financial, personnel, accounting, sales and lots more.

These lists are endless. To discover information that could help in the better decision making process or to identify new business opportunities from those endless sets of data, is one of the biggest challenges for an organization.

This challenge becomes more enormous for direct sales organisations.

In today’s Business intelligence dashboards, the end users of every sector follow an effective method of gaining greater insights into their business without the need to go back to the IT or business analysts to get more data.

Never miss an update from us. Join 10,000+ marketers and leaders.

And those types of data information, business intelligence and knowledge in the hands of the sales and marketing team means growth for those departments.

What Is Business Intelligence?

Business Intelligence is the combination of various technologies, tools, applications and best practices that helps a business to integrate, collect, analyse and present raw data to an actionable and insightful business data.

Business intelligence is prepared with:

  • Data Mining
  • Querying and reporting
  • Analytical processing

The major challenges for the direct dales companies :

  • The business hierarchies need to be on top across all the brands.
  • Taking longer to answer to critical business questions.
  • Lot of person-hours wasted for preparing daily transaction report.
  • Difficult to maintain the inventory for which the customers do not getting the right product in right time.
  • Lack in customer satisfaction without good services.
  • Preparation of the business report for board meeting.
  •  A single application could reduce technical support but impact planning flexibility thereby possibly reducing the performance and reliability.
  • Individual multiple applications could provide the flexibility required by the individual brands but would increase development time, cost and continuous technical support.
  • As per the need, a combined corporate view of actual, budgets and forecast scenarios must be taken care of.
  • Reporting requirements to be based on each brand, zone, categories and time.
  • Collect source files from the third party vendor.
  • Send the report through mail & put into the drop-box.
  • To build the excel report using ‘n’ number of sheets with separate dynamic report headers.
  • Organizations who are struggling with such immense data, Business Intelligence(BI)  is the right option for them. BI can help to identify new opportunities from those massive unstructured information; whose may  be remain unnoticed.

“People will forget what you said, people will forget what you did, but people will never forget how you made them feel” – Maya Angelou– Salesmate.

At Andolasoft we provide following supports to our clients.

  • The data-warehouse solution has been implemented in MYSQL 5.1, and incorporates data  from one principal source such as, Daily’s sales/order information.
    MYSQL 5.1 provides extreme performance for large data warehouses, improves  data warehouse performance, availability, and manageability by partitioning large tables.
  • Pentaho(Kettle) used as an Extract, Transform & Load (ETL) tool for loading data into the data warehouse from different data sources: Data consolidated from various data sources such as Flat files(csv, xls, txt) & OLTP databases.
  • The data in the warehouse is being processed for reporting and analysis purposes. The data is accessed through Excel. Data can be captured by stylist, item, store, zone, accounting year, quarter and period, and brand and concept.

Business-Intelligence-2-300x189

Reports:

  • Pentaho, Excel & CSV Add-ons were used for the purpose of reporting and analysis.
  • Reports could be generated for a specific stylist aggregation, i.e. zone, company, concept, brand, for a sequence day, week, quarter, or year.
  • Reports could be generated for a specific time to know the information about the booked item.
  • Reports could be generated to know the revenue income of the organization & compare with current MTD to Last MTD, like that current QTD & Last QTD.

Technologies That We Used:

  • MYSQL 5.1
  • Pentaho (Kettle)
  • Pentaho (Mondrian) as an OLAP
  • Excel & CSV Add-ons

Overall Benefits:

  • Data Warehouse designed for analysis, pattern search and reporting has been created.

How-Business-Intelligence-helps

  • Help to develop and deliver better forecasting: Answer ‘what if’ questions with a click of a button. Forecasting and planning can be conducted by taking existing data sets, applying theoretical projections and estimations to that information, to model and predict future outcomes.
  • Eliminate guesswork: Business intelligence can provide more accurate historical data, real-time updates, synthesis between departmental data stores, forecasting and trending, and even predictive ‘what if?’ analysis,” eliminating the need to guesstimate.
  • Get faster answers to any business queries
  • Get key business metrics reports when and where we need them
  • Identify cross-selling and up-selling opportunities: BI allows firms to leverage customer data to build, refine and modify predictive models that help sales representatives to up-sell and cross-sell products at appropriate customer touch points.
  • Manage better inventory
  • See where your business has been, where it is now and where it is going: BI has been very successful at explaining what happened to the business over some defined period of time — for example, how many products were sold, through which party, in which geography, or by which customer segment
  • Integrated budgeting & planning processes in a centralized web-based application.

Read Also: Data-Warehousing for Small & Medium Organizations

Implementation Of BI For A DS Organization

We at Andolasoft have expertise on building revenue, budgeting and forecasting data warehouse(DWH) to take care of the needs of each brand, timezone and category which minimizes both IT support and the technical expertise required by the management.

In the present market, the DWH reporting tools are expensive and beyond the affordability for the medium scale organizations. To cut down the cost, we provide well-formatted .xls & .csv file reports for the top management.

I’ve worked with the team at Andolasoft on multiple websites. They are professional, responsive, & easy to work with. I’ve had great experiences & would recommend their services to anyone.

Ruthie Miller, Sr. Mktg. Specialist

Salesforce, Houston, Texas

LEARN MORE

 Conclusion:

One of the goals of business intelligence is to help the corporate executives, managers and other operational heads to take necessary data driven decisions for business.

Most of the companies use BI for cost-cutting, creating better business opportunities and identifying inefficient processes of business.

If you are in search of a better Business Intelligence software development service, you can contact us. Our Andolasoft expertise will help to develop a budgeting, revenue and forecasting data warehouse that helps in your business growth.

Do you wish to add anything to this topic? Share it in the comments section below.

How to install and configure Jaspersoft in Linux Server(RHEL/Centos/Fedora)

Jaspersoft is a commercial open source software vendor focused on business intelligence, including data visualization, reporting, and analytics. It provides commercial as well as open source software, support services and licensing around the Jasper report, Jasper report server, Jaspersoft Studio, i-report and ETL products.

Jaspersoft is offered the communities open source edition as well as several commercial editions with broad support for various databases and data sources, including NoSQL and other big data sources. Jaspersoft’s main related product is JasperReports Server, a Java web application that provides advanced report server capabilities such as report scheduling, permissions, ad hoc reporting, dashboards, and multi-tenancy.

Unlike other traditional BI tools, it allows anyone to easily self-serve and get the answers they need inside their preferred app or on their favorite device. Our platform, unlike desktop visualization tools, scales architecturally and economically to reach everyone.

jaspersoft

Steps to Install ‘Jaspersoft Server’

STEP:1 Install JAVA 1.7 or above

STEP:2 Install Mysql server

# yum install mysql-server mysql php-mysql

STEP:3 Install tomcat 6 or tomcat 7
# yum install tomcat6 tomcat6-webapps tomcat6-admin-webapps

STEP:4 Download jaspersoft war file from “http://sourceforge.net/projects/jasperserver” by issuing the below command

# wget http://sourceforge.net/projects/jasperserver/files/JasperServer/JasperReports%20Server%20Community%20Edition%205.6.0/jasperreports-server-cp-5.6.0-bin.zip/download

STEP:5 Unzip zip file and move to “ opt “ directory

[sourcecode language=”plain”]# unzip jasperreports-server-cp-5.6.0-bin.zip
# mv jasperserver-ce-3.7.0-linux-installer.bin /opt/[/sourcecode]

STEP:6 Start Mysql service and Stop the tomcat service.

[sourcecode language=”plain”]# /etc/init.d/mysqld start
# /etc/init.d/tomcat6 stop[/sourcecode]

STEP:7
Go to this directory /opt/jasperreports-server-cp-5.6.0-bin/buildomatic
Then COPY “mysql_master.properties” file from this directory jasperreports-server-cp-5.6.0-bin/buildomatic/sample_conf/mysql_master.properties and Rename the “mysql_master.properties” to “default_master.properties”

STEP:8 Edit the default_master.properties file with vi editor

[sourcecode language=”plain”]# vi default_master.properties[/sourcecode]

Uncomment this below line

[sourcecode language=”plain”]# appServerType = tomcat6[/sourcecode]

Go to Tomcat app server root dir and modify“Catalina home and base “path as below
# If linux package managed tomcat instance, set two properties below

[sourcecode language=”plain”]CATALINA_HOME = /usr/share/tomcat6/
CATALINA_BASE = /var/lib/tomcat6/[/sourcecode]

# Change database location and connection settings setup as your own mysql passwd.

[sourcecode language=”plain”]dbHost=localhost
dbUsername=root
dbPassword=passwd[/sourcecode/]
# web app name
# (set one of these to deploy to a non-default war file name) uncomment as below any one
[sourcecode language="plain"]webAppNameCE = jasperserver
# webAppNamePro = jasperserver-pro[/sourcecode]

STEP:9 Download the mysql connector jar file from

[sourcecode language=”plain”]# wget https://total-pos.googlecode.com/files/mysql-connector-java-5.1.17-bin.jar[/sourcecode ]

<strong>STEP:10</strong> Put the mysql-connector-java-5.1.17-bin.jar file in tomcat directory
[sourcecode language="plain"]# /usr/share/tomcat6/lib/mysql-connector-java-5.1.17-bin.jar[/sourcecode]

STEP:11 Install this file under this directory

[sourcecode language=”plain”]# cd /opt/jasperreports-server-cp-5.6.0-bin/buildomatic
# ./js-install-ce.sh[/sourcecode]

STEP:12 Start the tomcat service

[sourcecode language=”plain”]# /etc/init.d/tomcat6 start[/sourcecode]

STEP:13 Browse in url

[sourcecode language=”plain”]# http://<ip-address>:8080/jasperserver[/sourcecode]

STEP:14 Login username and password
User login: jasperadmin
Passwd: jasperadmin

Conclusion:  Jaspersoft is available under an open source license for use in conjunction with open source infrastructure such as MySQL and JBoss, or a commercial license for enterprise deployments involving commercial databases and application servers. Jaspersoft’s main related product is JasperReports Server, a Java EE web application that provides advanced report server capabilities such as report scheduling and permissions.

Share your thoughts with comments

Configure Dropbox in RHEL/Centos/Fedora and File Upload From Linux To Dropbox

Dropbox is a free file hosting service operated by Dropbox, Inc. that lets you bring your photos, docs, and videos

dropbox2from anywhere and share them easily. Dropbox allows users to create a special folder on their computers, which Dropbox then synchronizes so that it appears to be the same folder (with the same contents) regardless of which computer is used to view it. Files placed in this folder also are accessible through a website and mobile phone applications.

Follow the below steps to configure Dropbox:

Step:1 Create an account on www.dropbox.com

Step:2 Login your Linux System

Step:3 we need to install dependency packages

# yum install curl bash

Step:4 Now go to /tmp directory and download dropbox up loader script and give appropriate permission to run script

test@localhost:~$ cd /tmp
test@localhost:~$ wget https://raw.github.com/andreafabrizi/DropboxUploader/master/dropbox_uploader.sh
test@localhost:~$ sudo cp dropbox_uploader.sh /usr/local/bin/droptobox
test@localhost:~$ sudo chmod +x /usr/local/bin/droptobox

Step:5 Now you can run the program anywhere from the terminal by running droptobox command

1
test:~$ droptobox

Here will ask you for the “App Key and App secret”,
Then create it from the Dropbox web and copy below url and paste in browser
# https://www.dropbox.com/developers/apps
Here we click “app” button and create an app. Give “Full Access” while filling the App details.
It will display an “App Key” and “App Secret” after successful creation.
Copy both App key and App Secret key and go to terminal and paste and give “f” in the access option.
# App key: xxxxxxxxxxxxxx
# App secret: xxxxxxxxxxxxxxx
# Access level you have chosen, App folder or Full Dropbox [a/f]: f
Then it will display a Link, Copy and paste it on the web browser and Allow the API access.

How to upload file from Linux terminal to dropbox:

Here we can use ” /usr/local/bin/droptobox ” or ” droptobox ”
## List Directory
# /usr/local/bin/droptobox list
## Upload a file to drop box
# droptobox upload file1
## Upload the files to your drop box /Test directory
# droptobox file1 Test/file1
## Delete a file “file1″ in “Test” directory in dropbox
# droptobox delete Test/file1
## Download a file “file1″ in “Test” directory in dropbox
# droptobox download Test/file1

See also : Andolasoft launches “Patia” – Free App to Find your file in Dropbox & Google Drive

Hope you liked the blog. It would be great if you can share your valuable comments with us.

How to monetize your Android application through In-App Billing?

In-App-Billing1What is In-app Billing ?

In-app products are the digital goods that you offer for sale from inside your Android application to your app users. You cannot use In-app Billing to sell personal services, physical goods, or anything that requires physical delivery.

Product types

The Version 3 API supports managed in-app products and subscriptions to give you flexibility in how you monetize your application. You can specify these types of products by using the Google Play Developer Console.

  • Managed in-app products:
    When a managed in-app item is purchased by an user, Google Play stores the purchase information for each item on a per-user basis.
  • Subscriptions :
    In In-app Billing, subscription plan offered you to sell content, services, or features to users from inside your app with recurring monthly or annual billing.

I will demonstrate a small example with In-app Billing,

To implement in app billing in your android project follow the below steps:

Step# 1: Installing the Google Play Billing Library
Before proceeding, verify you have installed the library by launching the Android SDK Manager by selecting the Eclipse Window -> Android SDK Manager option. Once loaded SDK Manager, scroll down to the Extras section and the Status column next to the Google Play Billing Library
Step# 2: Adding Billing Permission to the Manifest File
Add the following line in your AndroidManifest.xml file in order to make your app eligible to use in-App billing.

<uses-permission android:name=”com.android.vending.BILLING” />
Step# 3: Adding the Utility Classes to the Project
Find out the “TrivialDrive” sample project that was installed into the android SDK as part of the Google Play Billing library, includes a set of classes intended specifically for in-app billing implementation.

Locate the IInAppBillingService.aidl file in “TrivialDrive” sample project and add it to the package named “com.android.vending.billing”.

Then Select all nine Java files within “com.example.android.trivialdrivesample.util” package and copy and paste them into the <domainname>.inappbilling.util package of your InAppBilling project.

Step# 4: Designing the User Interface
Design your UI according to your need. This is a sample design developed to demonstrate the In-App Billing.

In-App-Billing-181x300


Step# 5: Obtaining the Public License Key for the App
Google Play billing must be identified by a unique public license key. The only way to get a public license key is to register an application within the Google Play.
Go to http://play.google.com/apps/publish Once you are logged in, In home page of the Google Play Developer Console, click the Add new application button, which specifying the default language and a title of InAppBilling. Once the above information has been entered, click the Upload APK button:
This APK file upload is not necessary at this point, so once the application has been registered, click on the Services & APIs option to display the Base64-encoded RSA public key for the application.

Step# 6: Creating a New In-app Product
Select the In-app Products menu item from the left hand panel of the developer console.To add a new product, click on Add new product button and, in the result panel, set the product type to Managed product and enter a Product ID (in this case com.andolasoft.testInApp). Click on Continue and in the second screen By entering a title, description and price for the item. Change on the menu at the top of the page to Activate.

Step# 7: Implementing “Purchase” Button click

public class MainActivity extends Activity {
 
    private static final String TAG = "<your domain>.inappbilling";
    IabHelper mHelper;
     
    private Button clickButton;
    private Button buyButton;
    private static final String TAG = "com.andolasoft.testInApp";
    IabHelper mHelper;
    static final String ITEM_SKU = "android.test.purchased";
.    @Override
    protected void onCreate(Bundle savedInstanceState) {
        super.onCreate(savedInstanceState);
        setContentView(R.layout.main);
 
        buyButton = (Button)findViewById(R.id.buyButton);
         
        String base64EncodedPublicKey =
                                       "<your license key here>";
         
            mHelper = new IabHelper(this, base64EncodedPublicKey);
         
            mHelper.startSetup(new
            IabHelper.OnIabSetupFinishedListener() {
                    public void onIabSetupFinished(IabResult result)
             {
                       if (!result.isSuccess()) {
                         Log.d(TAG, "In-app Billing setup failed: " +
                    result);
                       } else {             
                           Log.d(TAG, "In-app Billing is set up OK");
                              }
                      }
            });
    }
public void buyClick(View view) {
             mHelper.launchPurchaseFlow(this, ITEM_SKU, 10001,   
                    mPurchaseFinishedListener, "mypurchasetoken");
/*The developer payload token string. This can be any string value and is used to identify the purchase. For the purposes of this example, this is set to “mypurchasetoken”.*/
 
    }
@Override
protected void onActivityResult(int requestCode, int resultCode,
     Intent data)
{
      if (!mHelper.handleActivityResult(requestCode,
              resultCode, data)) {     
        super.onActivityResult(requestCode, resultCode, data);
      }
}
IabHelper.OnIabPurchaseFinishedListener mPurchaseFinishedListener
    = new IabHelper.OnIabPurchaseFinishedListener() {
    public void onIabPurchaseFinished(IabResult result,
                    Purchase purchase)
    {
       if (result.isFailure()) {
          // Handle error
          return;
     }      
     else if (purchase.getSku().equals(ITEM_SKU)) {
         consumeItem();
        buyButton.setEnabled(false);
    }
           
   }
};
public void consumeItem() {
    mHelper.queryInventoryAsync(mReceivedInventoryListener);
}
     
IabHelper.QueryInventoryFinishedListener mReceivedInventoryListener
   = new IabHelper.QueryInventoryFinishedListener() {
       public void onQueryInventoryFinished(IabResult result,
          Inventory inventory) {
 
                       
          if (result.isFailure()) {
          // Handle failure
          } else {
                 mHelper.consumeAsync(inventory.getPurchase(ITEM_SKU),
            mConsumeFinishedListener);
          }
    }
};
IabHelper.OnConsumeFinishedListener mConsumeFinishedListener =
      new IabHelper.OnConsumeFinishedListener() {
       public void onConsumeFinished(Purchase purchase,
             IabResult result) {
 
     if (result.isSuccess()) {                
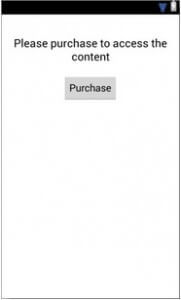
            //Here user paid for the app so write your logic to show the content to user
     } else {
             // handle error
     }
  }
};
 
@Override
public void onDestroy() {
    super.onDestroy();
    if (mHelper != null) mHelper.dispose();
    mHelper = null;
}
 
}

Step#8 : Upload the “APK”
Create the signed APK of your project and upload it in your added Application in Google Play Developer Console

Step# 9: Adding In-app Billing Test Accounts
Unfortunately, Google does not allow developers to make test purchases from their own Google accounts app billing, Other Google accounts used as testing accounts. . From ths ipoint on, in order to test in-app,  the users of these Google accounts must load your application onto their devices and make test purchases. To add a test user account, click Settings icon located on the left hand side of your Google Play Developer Console home screen and on the account details screen scroll down to the License Testing section. In the corresponding text box, give the Gmail accounts for the users who will be performing the in-app testing on your behalf before saving the changes.

Note: This email Id should be the primary account of an android device where this app is to be tested. Check with Google policy before publishing the app to the android market place.

Conclusion: I hope you find this post useful to sell your android in-app products and services, make transaction smoother and easier, and improve your revenue. If you are looking for any assistance regarding android application development or other android integration, then you can contact us.

See Also: How to monetize your iOS app through Apple In-App Purchase integration

Like this blog? I’d love to hear about your thoughts on this. Thanks for sharing your comments.
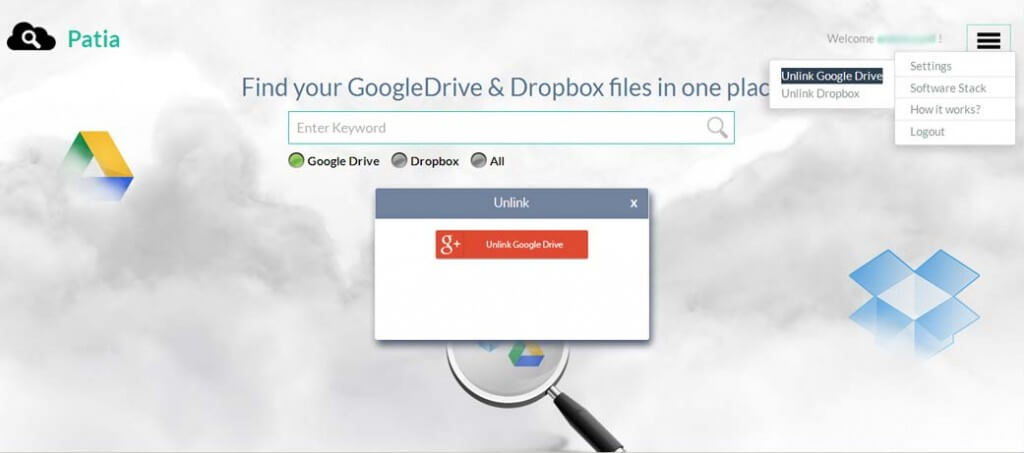
 

5 Reasons Why Web Development is Faster With Ruby On Rails

Ruby on Rails aka “RoR” is an open-source MVC framework built using the Ruby programming language.

It is considered as the epitome of the latest generation of high-productivity, open source web development tool. The growing demand for Ruby on Rails has been driven by successful RoR development companies like Andolasoft, who benefit from the speed and agility of building applications in Rails, which results in increased productivity and company growth.

1. Framework Built on Agile Methodology

RoR is faster because the framework was built based on Agile development methodology, best practices are emulated so web development is done with high quality and speed.

RoR framework includes support programs, compilers, code libraries, tool sets, and application programming interfaces (APIs) that bring together the different components to enable development of a project or solution.

Never miss an update from us. Join 10,000+ marketers and leaders.

It’s possible to build sites that used to take 12 weeks in just 6 weeks using Ruby on Rails. It means you can save 50% on your development expenses.

2. Less Code Writing

Rails creates a skeleton for an application or module by executing all the code libraries. You must write some commands to accomplish this. This is what makes the process of web development faster.

Rails makes database deployments simpler than any open, or proprietary solution by allowing for migrations.

  • Adopting principle of DRY

    It also adopts the principle of “Don’t Repeat Yourself”. So all information can be retrieved from a single unambiguous database which tends to easier development.

  • Easy Configuration

    A key principle of Ruby on Rails development is convention over configuration. This means that the programmer does not have to spend a lot of time configuring files in order to get setup, Rails comes with a set of conventions which help speeding up development.

  • Modular Design

    Ruby code is very readable and mostly self-documenting. This increases productivity, as there is little need to write out separate documentation, making it easier for other developers to pick up existing projects.

  • Designer Friendly Templates

    HTML templates is a core feature of Rails. It allow templates to be composed of a base template that defines the overall layout of the page,the base template is called a “layout” while the individual page templates are “views”. The Rails application retrieves the list of tags from the database and makes it available to the view.The section of the view that renders these category is:

    <%= render :partial => 'category' %>

    This refers to a Ruby partial, a fragment of a page, which is contained in _category.html.erb. That file’s content is:

<h3>categories</h3>
<p class="categorylist">
<%= render :partial => 'categorylist', :collection => @category %>
</p>
  • This generates the heading then refers to another partial, which will be used once for each object in the collection named “categorylist”.

3. Third Party Plugin/Gem Support

Mature plugin architecture, well used by the growing community. Rails plugins allows developer to extend or override nearly any part of the Rails framework, and share these modifications with others in an encapsulated and reusable manner.

Rails community provides a wealth of plugins as Ruby Gems that you simply add to your project Gem-file and install. This significantly accelerates development and maintenance time as you’re not trying to integrate disparate libraries, it’s already done for you.

4. Automated Testing

Rails has developed a strong focus on testing, and has good testing suit in-built within the frameworks.

Rails makes it super easy to write your tests. It starts by producing skeleton test code while you are creating your models and controllers.

I’ve worked with the team at Andolasoft on multiple websites. They are professional, responsive, & easy to work with. I’ve had great experiences & would recommend their services to anyone.

Ruthie Miller, Sr. Mktg. Specialist

Salesforce, Houston, Texas

LEARN MORE

Rails ships with a built-in test suite. There are many tools available in the market for testing Rails application as mentioned below with other web apps from many different aspects.

  • Rspec
  • Cucumber
  • Test Unit
  • Shoulda
  • Selenium (not really a ruby thing but more of a web thing)

But if you are new to testing we highly recommend you start with learning Rails own testing suite before start using other tools

5. Easier Maintenance

Once site launches, future modifications to your site (e.g., adding new features, making changes to the data model) can be made more quickly, for the same reasons noted above.
New features can be added quickly and maintaining applications over time can also be more cost-effective.

If you like this one, you might also like Why Rails framework popular among Ruby developers and The Best practices for Rails App Development .

Andolasoft launches “Patia” – Free App to Find your file in Dropbox & Google Drive

Now-a-days usage of cloud storage services like Google Drive, Dropbox are very popular. In general it is too hard to find a specific file from large heap of files in these cloud storages. We at Andolasoft released of a new FREE app named Patia to make your life easy.

Patia is designed to help you search Google Drive and Dropbox to find the shared files and documents from cloud storage without having to check them individually.

How does Patia work?

With Patia, you can type a keyword in the search bar and it will scan your Google Drive and Dropbox account for relevant files using the search term.

getpatia-1024x458

Setting Up Patia

To set-up Patia, you just need to run GetPatia.com in your browser.

Just tap into the ‘Signup’ link and it requires only email address and password.

gp_sign_up-1024x495

Setting Up Patia

To set-up Patia, you just need to run GetPatia.com in your browser.

Just tap into the ‘Signup’ link and it requires only email address and password.


gp_GoogleDrive-1024x453(1)

Once you are linked with your accounts, simply click on the search bar and enter what you are searching for. Patia will quickly scan the integrated accounts to find the items matching the term you entered.

You can narrow down your search by selecting specific options.
For example, if you would like to search a file from the Google Drive then just select the “Google Drive” button and start search.

gp_srch-1024x456

If you would like to disconnect the Google Drive from Patia, then simply click on ‘Unlink Google Drive’ under Setting menu. It will unlink your Google Drive account. Do the same for Dropbox to unlink from Patia.

gp_Unlink-1024x453

Patia requires no installation and you can access it using your Smartphone or Tablet on the go.

Check out some of our free apps and  free responsive web templates.

If you have any questions/comments we will be happy to get them in the comments section.